Archives
Real-World Protection Test Enterprise August-September 2023 – Testresult
Business Security Test August-September 2023 – Factsheet
Vendor F
Vendor E

NGFW Egress C2 Test: Assessing the Effectiveness of Outgoing Network Traffic Prevention and Detection Capabilities
Real-World Protection Test Enterprise March-June 2023 – Testresult
Performance Test June 2023
Business Security Test 2023 (March – June)
Bellow, you will find product descriptions of the tested enterprise products. Please note that the product descriptions are based on information provided by vendors. For more detailed and current information, please visit the vendors’ websites.
Avast Ultimate Business Security:
https://www.avast.com/de-de/business/products/ultimate#pc
Bitdefender GravityZone Business Security Premium:
https://download.bitdefender.com/resources/media/materials/business/en/bitdefender-business-security-datasheet.pdf
Cisco Secure Endpoint Essentials:
https://www.cisco.com/c/en/us/products/collateral/security/fireamp-endpoints/datasheet-c78-733181.html
CrowdStrike Falcon Pro:
https://www.crowdstrike.com/wp-content/uploads/2019/02/crowdstrike-falcon-pro-bundle-data-sheet.pdf
Cybereason NGAV:
https://www.cybereason.com/hubfs/dam/collateral/data-sheets/cr-ngav-redefined-data-sheet.pdf
Elastic Security:
https://www.elastic.co/guide/en/security/current/index.html
ESET PROTECT Entry with ESET PROTECT Cloud:
https://www.eset.com/fileadmin/ESET/US/product-overviews/business/ESET-PROTECT-B2B-offering.pdf
G DATA Endpoint Protection Business:
https://www.gdata.help/display/BS/Business+Solutions
K7 On-Premises Enterprise Security Advanced:
https://www.k7computing.com/us/pdf/k7-enterprise-brochure.pdf
Kaspersky Endpoint Security for Business – Select, with KSC:
https://content.kaspersky-labs.com/se/media/de/business-security/KESB_Product_Datasheet_Advanced_Customer.pdf
Microsoft Defender Antivirus with Microsoft Endpoint Manager:
https://learn.microsoft.com/en-us/microsoft-365/security/defender-endpoint/?view=o365-worldwide
Sophos Intercept X Advanced:
https://assets.sophos.com/X24WTUEQ/at/2b38x8h3fjg68jmm7tvbsp8m/sophos-intercept-x-ds.pdf
Trellix Endpoint Security (ENS):
https://www.trellix.com/en-us/assets/solution-briefs/trellix-endpoint-protection-platform-solution-brief.pdf
VIPRE Endpoint Detection & Response:
https://www.vipre.com/wp-content/uploads/2023/01/VIPRE_2022_DS_ENDPOINT-DETECTION-AND-RESPONSE_Jan_2023.pdf
VMware Carbon Black Cloud Endpoint Standard:
https://carbonblack.vmware.com/resource/carbon-black-cloud-endpoint-standard-technical-overview#section2
WatchGuard Endpoint Protection Platform (EPP):
https://www.watchguard.com/de/wgrd-resource-center/docs/watchguard-epp

Avast Ultimate Business Security includes a next-gen antivirus with online privacy tools and patch management automation software to help keep business devices, data, and applications updated and secure.
Key Features
Online Management Platform: Get real-time visibility of cyberthreats, comprehensive reporting, and administrative capabilities – right from your web browser. A cloud-based console lets you centrally manage your Avast Business security services and their subscriptions.
Next-gen Antivirus: Next-gen endpoint protection with File Shield, Web Shield, Mail Shield, real-time Behaviour Monitoring, and Cloud Sandbox help secure users’ devices against malware infections and zero-day threats.
Advanced Firewall: Monitor network traffic between your employees’ devices and the internet. Improve blocking of dangerous or superfluous data transmissions for better protection of your business against malicious data manipulation.
Ransomware Shield: Reinforce the protection of your sensitive data and other critical business documents against modification, deletion, or encryption by ransomware attacks. Choose which applications have permission to access your protected folders and block the rest.
Real Site: Real Site supports safer web browsing and banking by helping your employees avoid fake websites created to steal sensitive data such as usernames, passwords, and credit card details. It is designed to secure users against DNS (Domain Name System) hijacking.
Password Protection: Help safeguard your employees’ login information that is stored in web browsers from being stolen and misused. Password Protection is designed to prevent applications and malware from tampering with passwords that are saved in Google Chrome, Mozilla Firefox, Microsoft Edge, and Avast Secure Browser browsers.
VPN: Built-in personal VPN with no data limits encrypts your data traffic over the internet to help protect your employees’ data, making them also private when using public Wi-Fi networks, such as those in cafes or the airport.
USB Protection: Prevent employees from using unauthorized removable storage devices, including flash drives, external drives, and memory cards to avoid data theft, data loss, and malware infections.
Patch Management: Automatically fix vulnerabilities in Windows and third-party applications that are susceptible to cyberattacks by remotely patching devices, no matter where they are. Patch Management helps you distribute tested patches to hundreds of devices in minutes, with minimal impact on your network.


GravityZone Business Security Premium is designed to protect small to medium organizations, covering any number of file servers, desktops, laptops, physical or virtual machines. It is based on a layered next-gen endpoint protection platform with prevention, detection and blocking capabilities, using machine learning techniques, behavioural analysis, and continuous monitoring of running processes.
Key Features
Machine Learning Anti-Malware: Bitdefender’s machine learning models utilize 40,000 features and billions of file samples to predict and block advanced attacks effectively, improving malware detection accuracy while minimizing false positives.
Process Inspector: Operating in zero-trust mode, Process Inspector continuously monitors all processes in the system, detecting suspicious activities and anomalous behaviours. It effectively identifies unknown advanced malware, including ransomware, and takes remediation actions such as termination and undoing changes.
Advanced Anti-Exploit: This technology protects memory and vulnerable applications by detecting and blocking exploit techniques like API caller verification, stack pivot, and return-oriented-programming (ROP).
Endpoint Control and Hardening: Policy-based controls include firewall management, USB scanning for device control, and web content filtering with URL categorization.
Anti-Phishing and Web Security Filtering: Real-time scanning of web traffic, including SSL, http, and https, prevents the download of malware. Anti-phishing protection automatically blocks fraudulent web pages.
Response and Containment: GravityZone automatically blocks and contains threats, terminates malicious processes, and rolls back unauthorized changes.
Ransomware Protection: Bitdefender can detect new ransomware patterns, offering robust protection against evolving threats.
Automate Threat Remediation and Response: GravityZone neutralizes threats through actions such as process terminations, quarantine, removal, and rollback. Real-time threat information sharing with Bitdefender’s cloud-based threat intelligence service prevents similar attacks globally.
GravityZone Control Center: GravityZone Control Center is an integrated and centralized management console that provides a view for all security management components. It can be cloud-hosted or deployed locally. GravityZone management center incorporates multiple roles and contains the database server, communication server, update server and web console.


Cisco Secure Endpoint Essentials is a comprehensive endpoint security solution that provides advanced protection, threat detection and response capabilities in a single agent that offers Endpoint Detection and Response and integrated Extended Detection and Response (XDR) capabilities.
Key Features
Advanced Protection: Cisco Secure Endpoint uses a layered approach consisting of reputation, application, process and command monitoring, machine learning and behavioural analysis to detect and prevent advanced attacks.
Next-Generation Antivirus (NGAV): Preventative technologies to stop malware by leveraging file reputation, exploit prevention, script protections, and signature detection techniques to stop known and unknown threats.
Endpoint Detection and Response (EDR): Real-time visibility and control of endpoint activities to enable threat hunting and accelerate incident response.
Threat Intelligence: Cisco Talos Intelligence provides the latest threat intelligence to identify and prevent emerging threats.
Dynamic analysis: Produces detailed runtime insight and analysis, including the severity of behaviours, the original file name, screenshots of the malware executing, and packet captures.
Device Control: Visibility and control over USB mass storage devices.
Secure Endpoint: This prevents breaches, blocks malware at the point of entry, and continuously monitors and analyses file and process activity to rapidly detect, contain, and remediate threats that can evade front-line defences.
Prevention and Detection: Identify and stop threats before compromise. Reduce the attack surface with prevention techniques, risk-based vulnerability management, and posture assessments. Enable hunts for hidden threats, detect malware, and perform advanced investigations.
Rapid Response: The Cisco Secure portfolio provides automatic global outbreak control. Endpoint response ranging from file, application and network control to automated actions and isolation help automate endpoint triage and threat containment to reduce time to respond.
Extended Detection and Response (XDR): Reduce incident detection and response times with Cisco Extended Detection and Response (XDR). Built-in integration with the Cisco Secure portfolio and 3rd party solutions to provide a unified view to simplify and orchestrate incident response across your security control points, for a layered defence against threats.
Flexible Deployment and Simplified Management: The solution is easy to deploy, manage, and scale. It can be deployed on-premises or in the cloud, providing flexibility to meet different organizational needs.
Single Agent: Cisco Secure Endpoint Essentials combines Endpoint Prevention, Detection and Response in a single agent.
Management Console: The solution provides a centralized management console to manage and monitor endpoints and can be deployed on-premises or in the cloud.
Scalability: management console can scale to support businesses as they grow.


CrowdStrike Falcon Pro offers cloud-native capabilities through a lightweight agent and a centralized command center. In addition to threat protection, it provides investigative functions and threat intelligence for analysis and remediation of attacks. The solution is scalable, making it suitable for managing networks with thousands of devices.
Key Features
Easy to deploy: The Falcon agent is easy to deploy at scale, offering instant protection without the need for a reboot or tuning processes.
Advanced Threat Detection: Falcon Pro is designed to detect advanced and unknown threats, including fileless attacks, ransomware, adware, and potentially unwanted programs.
Full Attack Visibility: The solution provides attack visibility through a process tree. It unravels complete attack scenarios, enriches them with contextual threat intelligence, and maps adversary behaviours using MITRE ATT&CK® terminology.
Falcon Fusion: Falcon Pro includes Falcon Fusion, an integrated Security Orchestration, Automation, and Response (SOAR) framework. This enables IT and security teams to streamline workflow orchestration and automation.
Signatureless Approach: Falcon Pro does not rely on signatures, eliminating the need for daily virus definition updates. This reduces the administrative overhead and ensures protection against emerging threats.
Exploit Blocking: The solution proactively blocks the execution and spread of threats through unpatched vulnerabilities, preventing potential exploitation.
On-Write Quarantine: Falcon Pro detects and isolates malicious files as soon as they appear on a host, ensuring they are contained and unable to cause harm.
Custom Indicators of Attack (IOAs): Teams can utilize custom IOAs to create behaviour-based blocking rules tailored to their specific organizational needs, providing enhanced protection against targeted attacks.
Advanced Memory Scanning: Automated memory scans are performed using behavioural triggers to prevent fileless and memory-based attacks, such as ransomware and the use of dual-purpose tools like Cobalt Strike, earlier in the kill chain.
Quarantine Functionality: Blocked files are quarantined, allowing analysts to access and investigate them for deeper analysis and understanding of the threat landscape.
Script-Based Execution Monitoring: Falcon Pro inspects and blocks malicious office macros, preventing script-based attacks.
Incident Response Acceleration: The solution accelerates incident response workflows by offering automated, scripted, and manual response capabilities. This streamlines the incident management process and enables faster resolution.
Built-in Threat Intelligence: Falcon Pro integrates comprehensive threat intelligence, strengthening detection capabilities and enhancing the efficiency of Security Operations Centers (SOCs). From automatic sandbox submissions of blocked files to actor profiles, analysts can gain valuable insights into threats and adversaries without exposing their local systems and network infrastructure.


Cybereason NGAV: Multiple layers of unparalleled attack protection. Cybereason brings a unique approach of multi-layered NGAV defence, with multiple layers purpose-built to prevent unique attacker techniques. Designed to stop everything from the simplest to the most novel Malware that exists today, even those never before seen. When these independent, yet complimentary, layers are combined, unparalleled attack protection is achieved.

During AV-Comparatives testing, a base configuration of Cybereason NGAV is used where many of these unique layers are enabled. The most unique layers in the Cybereason NGAV product enabled during the testing are AI-Based Anti-Malware and Fileless Malware Prevention.
Key Features
Anti-Malware: Designed to block malware, the AI-Based anti-malware layer leverages artificial Intelligence to evaluate behaviour occurring across the enterprise as a whole to stop actors in their tracks, even when they’re using never before seen malware.
Fileless Malware Prevention: Purpose-built to block in-memory command line and script-based attacks, the Fileless Malware Prevention layer examines the behaviour of the PowerShell engine, .Net, JScript, and VBScript to ensure that attackers are not able to slip by defences by loading malicious code into memory.


Elastic Security for endpoint prevents ransomware and malware, detects advanced threats, and arms responders with vital investigative context. Elastic Security provides organizations with prevention, detection, and response capabilities across running on both traditional endpoints and public, private, and hybrid cloud environments.
Elastic Security combines SIEM threat detection features with endpoint prevention and response capabilities in one solution. These analytical and protection capabilities, leveraged by the speed and extensibility of Elasticsearch, enable analysts to defend their organization from threats before damage and loss occur.
Key Features
Prevent complex attacks: Prevent malware and ransomware from executing, and stop advanced threats with malicious behaviour, memory threat, and provides credential hardening protections. All powered by Elastic Labs and the global community.
Detect threats in high fidelity: Elastic Defend facilitates deep visibility by instrumenting the process, file, and network data in users’ environments with minimal data collection overhead.
Triage and rapid response: Elastic Security allows for detailed analysis of data across hosts and examining of host-based activity with interactive visualizations. It allows users to invoke remote response actions across distributed endpoints. The investigation capabilities can be further extended with the OSquery integration, fully integrated into Elastic Security workflows.
Secure cloud workloads: This allows stopping threats targeting cloud workloads and cloud-native applications. The lightweight user-space agent, powered by eBPF, allows for real-time visibility and control. Automates identification of cloud threats with detection rules and machine learning (ML). MITRE ATT&CK-aligned detections honed by Elastic Security Labs enable a rapid time-to-value.
View terminal sessions: This gives security teams an investigative tool for digital forensics and incident response (DFIR), reducing the mean time to respond (MTTR).
Continuous Monitoring: Including both user and network activity monitoring but also custom security monitoring. This allows the protection of platforms like AWS, GCP, and Azure from data theft, resource hijacking, and sabotage. Allowing users to observe container security and health and to safeguard distributed workplaces by tracking IT and security applications from Azure AD to Zoom.


ESET PROTECT is powered by ESET LiveSense, ESET’s multi-layered technology that combines machine learning and ESET LiveGrid, ESET’s global, cloud-based reputation system.
Key Features
Combines cybersecurity needs: ESET PROTECT Platform integrates multiple cybersecurity capabilities under one roof so customers can choose which are most effective for protecting their organization. It is simple, modular, adaptable, and continuously innovated – across all operating systems.
Modern endpoint capabilities and protection tools: ESET uses multi-layered technologies that go far beyond the capabilities of basic antivirus or antimalware. ESET PROTECT Entry provides ESET’s multi-layered protection and threat intelligence information, which protects against ransomware and botnets, blocks targeted attacks, prevents data breaches, and detects zero-day threats, fileless attacks, advanced persistent threats and more.
In-house research and development: ESET’s teams not only develop its products but also publish research. ESET is also currently among the top 5 contributors and top 10 referenced sources in the MITRE Enterprise Matrix, thus providing much-needed intelligence into TTPs exploited by diverse APT groups.
Local language support for users in every corner of the globe: The enterprise management consoles are available in 23 languages, and the endpoint security solution in 37 languages, making ESET’s solution one of the most accessible.
Network management with one-click actions: Actions such as isolating the device from the network, creating an exclusion, or initiating a scan are available with a single click in ESET PROTECT console.
Deep-dive insights into the network: ESET PROTECT Platform provides over 120 built-in reports and allows you to create custom reports from over 1000 data points.
Real-time alerts about incidents in your organization: Use pre-defined notifications or create your own. The notification system features a full “what you see is what you get” editor.
Effortless and quick installation: Deploy pre-configured live installers that automatically activate and connect your endpoints to the management console.


G DATA Endpoint Protection Business is a long-standing product line that has developed from a static scanning engine only product into incorporating next generation scanning and heuristic technologies. These technologies help us detect and prevent malware even when normal scanning approaches fail.
Key Features
Privacy by design: G Data’s development only happens in Germany, which had very strict data privacy laws even before the GDPR, employing strict privacy by design and by default rules in the development of their software.
Online and offline protection: G Data’s products offer very strong offline and local protection by design. Protection modules work offline and do not require a cloud connection, although the cloud connection does improve detection against latest and unknown threats.
BehaviorStorage (BEAST) module: This module runs locally on the client and does not transmit user behaviour data into a cloud. BEAST is able to run completely independent of Internet connectivity and can still classify suspicious or malicious activity.
In house support: Support is not outsourced, being involved in the development processes which enables G Data to fix errors reported by customers.
MMC style admin: Allowing for easy use by Windows administrators.


K7 Security simplifies deployment and management, protecting client workstations and critical servers. The Centralised Management Server consolidates threats, implements endpoint security policies, and manages them with fewer IT resources. The web-based console handles K7 software installation on multiple endpoints, user group creation, policy enforcement, task scheduling, updates, and remote management of core capabilities such as Antivirus, Firewall, Application Control, and Web Content Filtering.
Key Features
Admin Console: The web-based interface enables complete security settings management, including client installation, group and policy management, task scheduling, updates, and control over Antivirus, Firewall, Application Control, Web Filtering, and Notifications.
Advanced Malware Detection and Remediation: The Host Intrusion Prevention System collates, analyses and triages various events to effectively detect and deal with malware. This feature deals with analysis of both pre-execution and runtime behaviour of monitored objects in the host.
Anti-Ransomware Protection: Monitors secured devices for ransomware, employing signature-less, behaviour-based detection mechanisms. K7 Ecosystem Threat Intelligence enhances protection against known and new ransomware variants. Real-time security defends against ransomware distribution through shared files and folders on the network.
K7 Device Control: This prevents USB and storage media infections by blocking unauthorized access to unknown devices. Host-level policies enforce device password access, file execution control, and on-demand/automatic device scanning.
K7 SafeSurf: This ensures secure online browsing by identifying and blocking malicious websites through URL analysis and cloud-based reputation services.
K7 Firewall / HIPS: The K7 Firewall, working with the integrated Host Intrusion Prevention System (HIPS), stealths system ports and protects against direct attacks. The Intrusion Detection System (IDS) blocks known malicious network-based exploits before processing.
System Security and Performance: K7 Security prioritizes system performance by utilizing a proprietary lean data-loading algorithm and ordering mechanism, minimizing RAM and CPU usage.
Web Categorisation: Web Categorization allows administrators to define website and content access for company devices, limiting access to unproductive or inappropriate sites.
Groups and Policies: Endpoint security is managed through groups and policies, controlling malware detection, and user settings. Default settings provide optimum security, and end-users are limited to updates and scans.
Application control: This enables automatic reporting and blocking of applications, including version-based blocking.
Fine control of administrative privileges: Administrative privileges can be fine-tuned with custom roles and group-based administration.
Scans: Options include Quick Scan, Full System Scan, and Vulnerability Scan, with patch links. Scans can be scheduled and deployed to desired endpoints.


Kaspersky Endpoint Security for Business is a next-gen endpoint security solution which can secure organizations against a wide range of threats, from BIOS-related to fileless threats. The solution provides crucial endpoint management and security tools to IT administrators and cybersecurity specialists in organizations of any size and type.
Key Features
Protect user data: Kaspersky Endpoint Security for Business protects all endpoints against widespread and emerging threats, thanks to Kaspersky technologies like behaviour-based protection from advanced threats including fileless ones, ML-based analysis, and specific protection against exploits, ransomware, miners and financial spyware. Recognizing threat behaviour patterns, allows for the neutralizing of unknown threats.
Proactive protection: Stops attacks before they start. System hardening by Adaptive Anomaly Control combines the simplicity of blocking rules with the smartness of automatic tuning, based on behaviour analysis.
Reduced attack surface: This is achieved by controlling what applications, websites and devices can interact with endpoints and users.
Complete ecosystem: Users can grow their IT security maturity. Automated response and analysis leverages integrations with EDR and SIEM solutions
Single solution for any platform: Security for every workstation, server and mobile device that carries user data, regardless of location and ownership.
Cross platform support: A single solution, working from a single console covers every OS in a mixed environment.
High levels of automation: Particularly for essential but routine tasks such as patching and OS deployment.
Remote management capabilities: Covering different scenarios, like setting up workstations in home offices or securing data with encryption options.
Centralization: Integrated single-screen management, either at the user’s perimeter or in the cloud.
Futureproofing: Upgrading is seamless, allowing users to move through the tiers. The fully scalable solution is ready to support thousands of managed devices as companies grow.
Flexibility: Users can choose their preferred deployment option: in the cloud, on-premises, air gapped and in hybrid deployments. Then they can allocate different levels of security systems access to different team members with granular role-based access control (RBAC).


Microsoft Defender Antivirus is pre-installed on Windows 10/11 systems. In business environments, it can be managed e.g. with Microsoft Defender for Endpoint’s P1 plan. Microsoft Defender for Endpoint is an enterprise security product designed to help organizations prevent, detect, and respond to evolving threats across operating systems and network devices. Its antivirus capability combines machine learning models trained on cloud-scale data and behaviour-based detection to protect in real-time against malware and malicious activity.
Key Features
Defender for Endpoint’s P1 plan allows security teams to do the following:
Eliminate blind spots in their environment: Discover unmanaged and unauthorized endpoints and network devices. Secure these assets using integrated workflows.
Block sophisticated threats and malware: Examples include novel polymorphic and metamorphic malware, and fileless and file-based threats. With cloud-delivered, next-generation protection, analysts benefit from near-instant detection and blocking of these threats.
Apply manual response actions: Security teams can act on devices or files when threats are detected, such as quarantining them.
Harness attack surface reduction capabilities: Harden devices, prevent zero-day attacks, and take granular control over endpoint access and behaviours. These capabilities include rules, ransomware mitigation, device control, web protection, network protection, network firewall, and application control.
Access unified security tools and centralized management: Security administrators can use role-based access control from the Microsoft 365 Defender customizable portal to manage which users have access to which assets.
Management console: The Microsoft 365 Defender portal provides security teams access to unified security tools and centralized management. This can be used to monitor and respond to alerts of potential threats and can go beyond protecting endpoints to securing across identities, data, apps, and infrastructure.
Customizable home page: The landing page provides a customizable view that shows at-risk devices, threats detected, alerts/incidents and actionable information depending on which Microsoft Defender capabilities the organization is using. Examples of what you can see:
- Incidents & alerts: Lists incidents that were created as a result of triggered alerts generated as threats are detected across devices.
- Action center: This lists remediation actions taken. Analysts can see details like investigation package collection, antivirus scan, app restriction, and device isolation.
- Reports section: This section includes reports that show threats and their status.
- Device Inventory: A list of the devices in the user’s network that triggered alerts. This shows domain, risk level, OS platform, and other details for easy identification of devices most at risk.


Sophos Intercept X Advanced is an endpoint security solution designed to minimize the attack surface and prevent attacks. It combines multiple technologies, including anti-exploit, anti-ransomware, deep learning AI, and control technology to detect and block threats before they can impact users’ systems.
Key Features
Stop Unknown Threats: Intercept X utilizes deep learning AI to identify and block malware that hasn’t been seen before. It analyses file attributes to detect threats without relying on signatures.
Block Ransomware: Intercept X incorporates anti-ransomware capabilities that identify and block the encryption processes used in ransomware attacks. Encrypted files can be rolled back to a safe state, minimizing the potential impact.
Prevent Exploits: The anti-exploit technology in Intercept X prevents attackers from leveraging exploit techniques to compromise devices, steal credentials, and distribute malware. This protection extends to file-less attacks and zero-day exploits.
Reduce the Attack Surface: Users have control over the apps and devices allowed to run in their environment. Intercept X enables blocking of malicious websites and potentially unwanted apps (PUAs).
Synchronized Security: Sophos solutions work together seamlessly. For instance, Intercept X and Sophos Firewall share data to isolate compromised devices during cleanup, restoring network access once the threat is neutralized, all without requiring admin intervention.
Straightforward Management: Intercept X is managed through Sophos Central, the cloud-based management platform for all Sophos solutions. This centralized management approach simplifies deployment, configuration, and management, including remote working setups.
AI and Expert Powered Data: Intercept X combines the power of deep learning AI with the expertise of SophosLabs cybersecurity professionals to provide robust protection and accurate threat detection.


Trellix Endpoint Security (ENS) is a comprehensive security solution designed for enterprise networks of all sizes. The ePolicy Orchestrator management console offers flexible options, including both cloud-based and on-premises consoles, for efficient management of the endpoint protection software.
Key Features
Customizable Dashboard: The dashboard and reporting can be tailored to display relevant endpoint status information for each user.
Deployment Flexibility: The console offers a variety of deployment options, including cloud-based, on-premises hosting, and Amazon hosting.
Management Console: The ePolicy Orchestrator console is easily accessed through the primary navigation menu located at the top left of the main dashboard. It provides access to different sections and pages, such as Dashboard, Reporting, Policy Management, Automation, and Software and Systems Administration. Integration of additional components like DLP, Mobile Security, and Insights Threat Intelligence and EDR is also available.
Real Protect: Through machine learning classification, threats are detected in real time, and behavior classification continually evolves to identify future attacks. Endpoints are restored to the last known good state, preventing infections and reducing administrative burdens.
Adaptive Scanning: The system intelligently skips scanning trusted processes and gives priority to suspicious processes and applications during scanning.
Endpoint Client Deployment: Client agent packages can be created on the Product Deployment page. The installer file can be distributed via a web link, manually executed, or deployed through a systems management product. After installation, the agent downloads the necessary protection engine before full protection becomes active. The client interface displays the installed and enabled protection components.
Proactive web security: This feature ensures safe browsing by providing web protection and filtering for endpoints.
Hostile network attack blocking: The integrated firewall utilizes reputation scores based on GTI to safeguard endpoints against botnets, DDoS attacks, advanced persistent threats, and suspicious web connections. During system startup, the firewall only allows outbound traffic, providing protection when endpoints are not connected to the corporate network.
Antimalware protection: Trellix protects, detects, and corrects malware quickly with an antimalware engine that works across multiple devices and operating systems.


VIPRE Endpoint Detection & Response (EDR) provides comprehensive endpoint protection with next-gen antivirus (NGAV) and EDR features combined into a seamless platform. Designed to automatically block the vast majority of threats, and to provide for quick and efficient containment and investigation of potential threats, VIPRE provides everything you need to keep your endpoints and users safe.
Key Features
Detailed network protection: This includes a full IDS, DNS Protection, and browser exploit prevention. The core NGAV components scan for and remove any latent malware, and behavioural process monitoring ensures that apps and users behave. The EDR layer on top of these core components orchestrates response to zero-day and persistent threats that can’t be immediately identified as malicious, but that represent a possible threat.
Supports investigation: EDR bundles in endpoint vulnerability scanning, raw event telemetry, and detailed root cause analysis. VIPRE Endpoint Detection & Response (EDR) includes access to cloud-based malware analysis sandboxes to investigate suspicious files and URLs, with detailed results presented right in the console. It also includes a simple method to isolate endpoints that are misbehaving, to prevent attack spread and give you time to understand what is happening on the endpoint.
Remediate threats on endpoints: EDR will help patch vulnerable applications automatically and provides for integrated remote access to the endpoint to clean up files, processes, registry keys, and more. Any files corrupted by zero-day ransomware will be restored. Any security gaps identified by your investigation can be closed quickly.
Single Interface: VIPRE EDR combines all these tools into a clean, easy to use interface that helps speed response times and reduce confusion. Mobile responders can access everything from their smartphones, avoiding the expense, annoyance, and delays of having to rush into the office. And with transparent delegated access via VIPRE Site Manager, MSPs, MSSPs, and MDR providers can assist in incident response and investigation with zero friction.


VMware Carbon Black Cloud™ Endpoint Standard is a cloud native endpoint, workload, and container protection platform that combines the intelligent system hardening and behavioural prevention needed to keep emerging threats at bay. The cloud native protection platform enables customers to utilize different modular capabilities to identify risk, prevent, detect and respond to known and unknown threats using a single lightweight agent and an easy-to-use console. Its sensor serves as both a continuous event recorder and preventive action agent. For detection and response purposes, the VMware Carbon Black Cloud captures all process executions and associated metadata, file modifications, registry modifications, network connections, authentication events, module loads, fileless script executions, and cross-process behaviours (i.e., Process injection). All this behavioural activity is captured and streamed live to your cloud instance for visualization, searching, alerting, and blocking. This allows for both real-time and historical threat hunting across your environment. The VMware Carbon Black Cloud also keeps track of every application executed in your environment and its metadata, including a copy of that binary for forensics purposes.
Key Features
Threat prevention updates: Carbon Black deploys updates to prevent the latest attack techniques focused on behavioural attributes quickly without additional effort required by users.
Custom detections: Rapidly deploy custom detections in the form of threat intelligence indicators focusing on the same behavioural attributes.
Alert and detections mapping: Alerts and detection techniques can be directly mapped to MITRE ATT&CK®.
Post analysis tools: Search for binary prevalence, process masquerading, binary signing issuers, and forensic capture for post analysis
Robust and extensible API: Some examples of 3rd party API integrations are:
- YARA
- Out of the box SIEM, SOAR and ITSM API integrations
- Binary Detonation and Sandboxing Uploads
- Network security/service appliances (DNS, IDS, IPS, DHCP)
- File integrity monitoring – VMware Carbon Black Cloud can alert any time files, file paths, registry keys, and registry hives are


WatchGuard EPP is a cloud-native security solution that centralizes next-gen antivirus with advanced technologies to protect against threats. It offers real-time monitoring, behaviour analysis, and blocking of malware. WatchGuard EPP defends against ransomware attacks with contextual detections, anti-phishing, decoy files, and shadow copies.
Key Features
Multiplatform Security: cross-platform security for various systems. Management of licenses belonging to both persistent and non-persistent virtualization infrastructure (VDI).
Management and Installation: Multiple deployment methods available, with automatic uninstallers for other products allowing rapid migration from third-party solutions. Deployment can be done via email and download URL, or silently to selected endpoints via the solution’s distribution tool. The MSI installer is compatible with third-party tools (Active Directory, Tivoli, SMS, etc.).
Performance: all operations are performed on the Cloud. WatchGuard EPP requires no installation, management, or maintenance of new hardware resources in the organization’s infrastructure.
Centralize Device Security: centralized management from a single web-based administration console for all workstations and servers on the corporate network.
Malware and Ransomware Protection: WatchGuard EPP analyses behaviours and hacking techniques to detect and block both known and unknown malware, as well as ransomware, trojans and phishing.
Advanced Disinfection: in the event of a security breach, affected computers can be restored to the state before infection with advanced disinfection tools. Quarantine stores suspicious and deleted items. Administrators can remotely restart workstations and servers to ensure the latest product updates are installed.
Real-time Monitoring and Reports: detailed, real-time security monitoring is delivered via comprehensive dashboards and easy-to-interpret graphs. Reports are automatically generated and delivered on protection status, detections, and improper use of devices.
Granular Configuration of Profiles: Assign user profile-based protection policies, ensuring appropriate policies for every user group.
Centralized Device Control: Stop malware and information leaks by blocking device categories (flash drives, USB modems, webcams, DVD/CD, etc.), allowlisting devices or configuring read-only, write-only, and read-and-write access permissions.
Vulnerability Assessment: Vulnerability assessment helps IT teams to identify, evaluate, and prioritize security weaknesses and vulnerabilities in applications and systems.
Malware Freezer: Quarantines malware for seven days and, in the event of a false positive, automatically restores the affected file to the system.
Ransomware Remediation and Recovery: Besides encrypting files, adversaries try to delete backup and VSS files and turn off services designed to help recovery. Files are protected using shadow copies, which can be used to recover ransomware encrypted files.

Mac Security Test & Review 2023
Summary
Avast Security Free for Mac is a free antivirus program and well suited to non-expert users. Some of its key aspects are:
- easy and straightforward installation and setup of core features
- most common features displayed in a clean and well-laid-out GUI
- different scan options and comprehensive settings, including scheduled scans
- clear and persistent alerts
- normal user accounts cannot take risky actions (e.g., disable protection, uninstall program)
Installation, Setup & Deinstallation
To set up Avast Security on your Mac, you just download and run the installer file from the vendor’s website. The initial setup is straightforward as the program guides you through step by step and provides brief explanations. You can uninstall the program by clicking Avast Security > Uninstall Avast Security in the macOS menu bar or opening the Avast Security Uninstaller directly from the macOS Applications folder.
General Handling & Essential Features
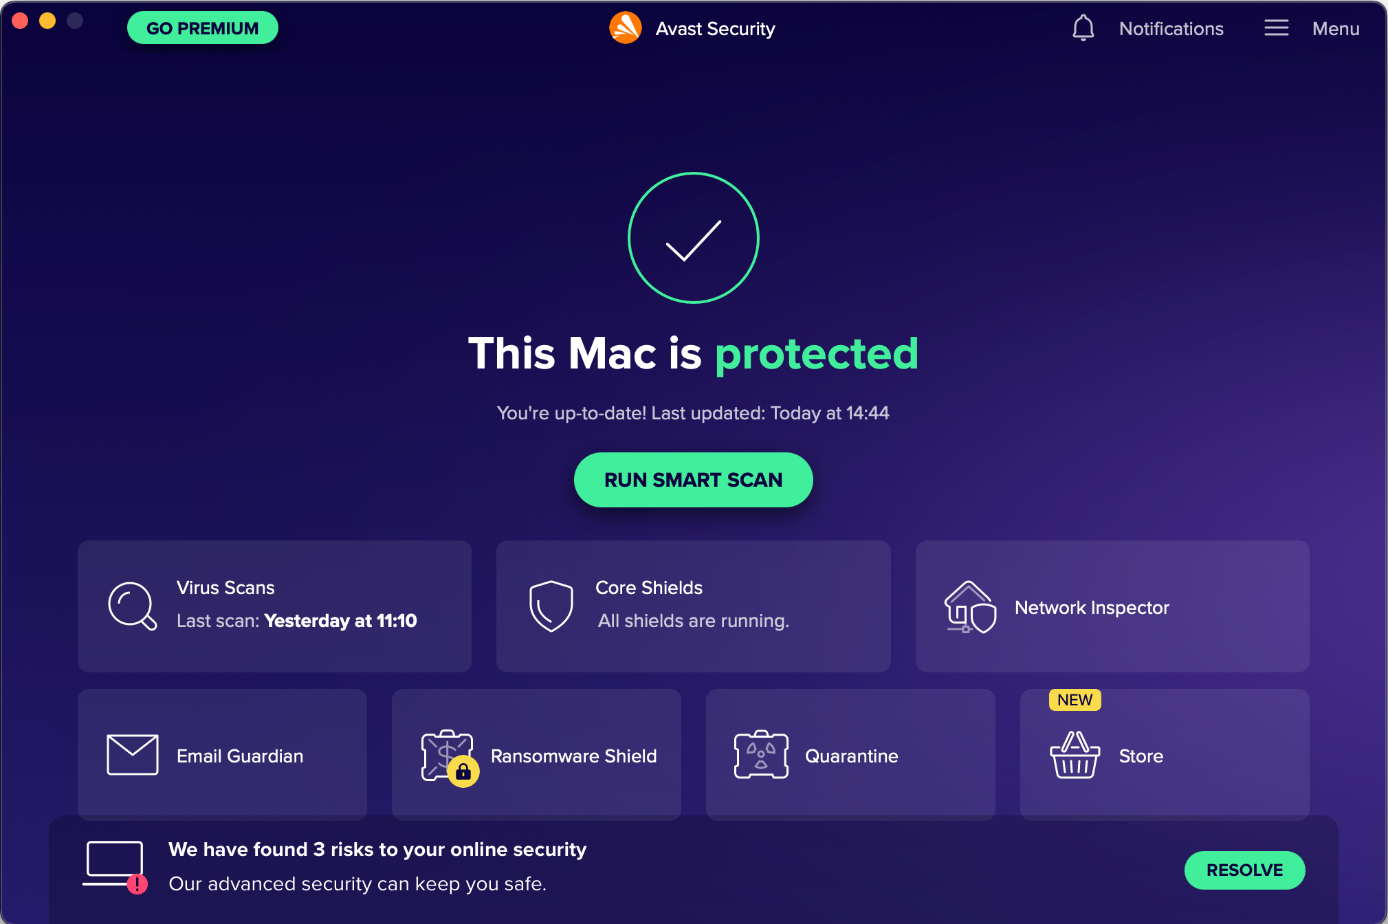
Protection status, smart scan, scan options (Virus Scans), protection features (Core Shields), and quarantine are all found on the home page of the main program window. Settings (Preferences) can be opened from the program menu in the top right-hand corner or the macOS menu bar. Subscription information is not applicable, as the program is free. A manual update can be triggered by clicking Check for Updates from the system tray icon or Avast Security in the macOS menu bar. The online help is accessible from the Help menu in the program menu which opens the support page in the default browser.
Protection
From Virus Scans on the home page, you can start a smart scan, deep scan of all drives and the system memory, external storage scan of connected storage devices, or targeted scan of specific files or folders. The latter can also be run from e.g., the Finder context menu. Scheduled scans can be configured as well. The detection behaviour and settings of the different scan types can be changed from Preferences. The detection of PUA is enabled by default. The Email Guardian scans emails of provided mail accounts and flags any that seem suspicious. In the free version, only mail apps installed on the Mac are supported (e.g., Apple Mail, Outlook).
Alerts
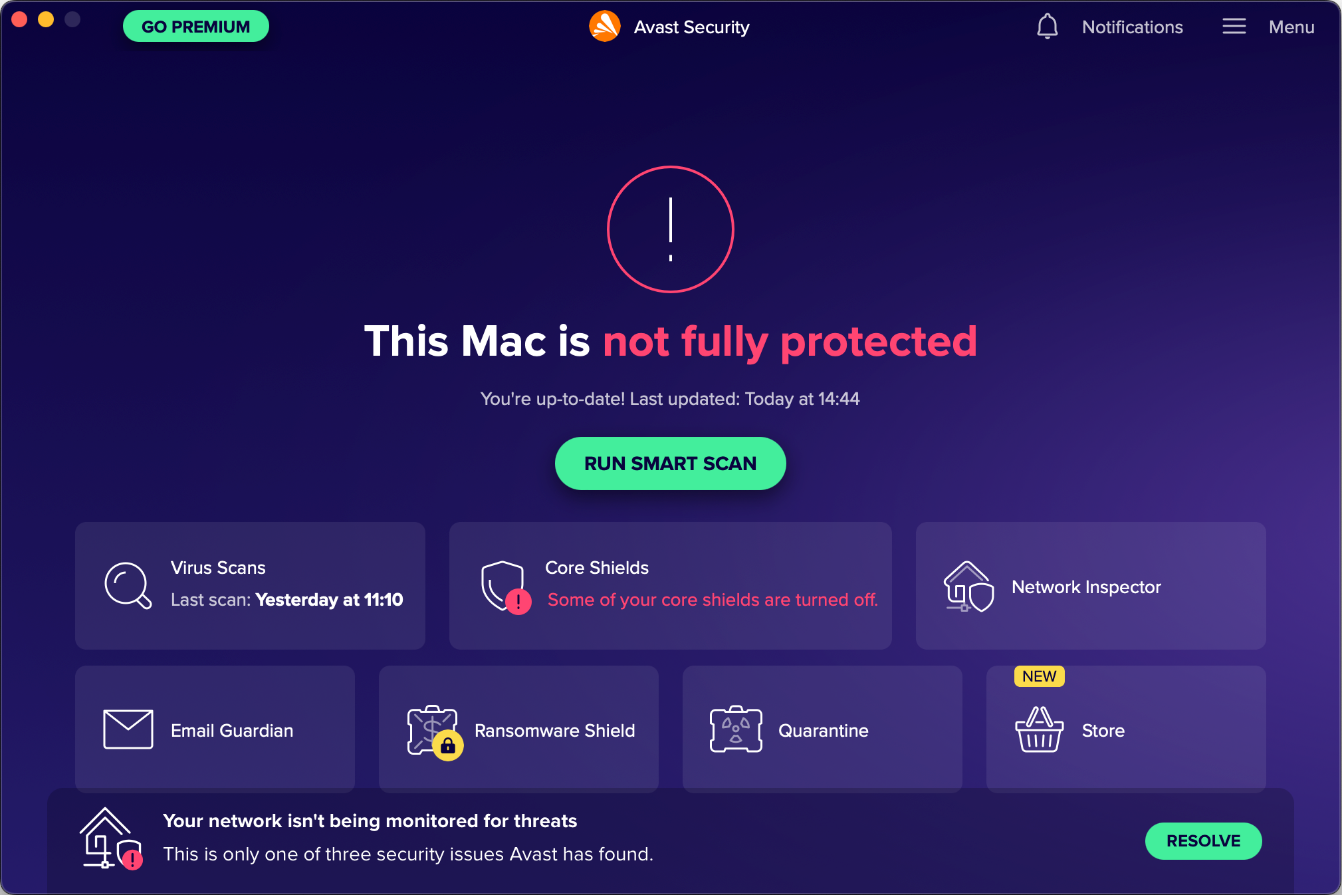
When we disabled Avast’s real-time protection (File Shield) or web protection (Web Shield) under Core Shields on the home page, an alert was shown in the main program window. To reactivate either protection feature, we had to manually go into Core Shields and turn it back on.
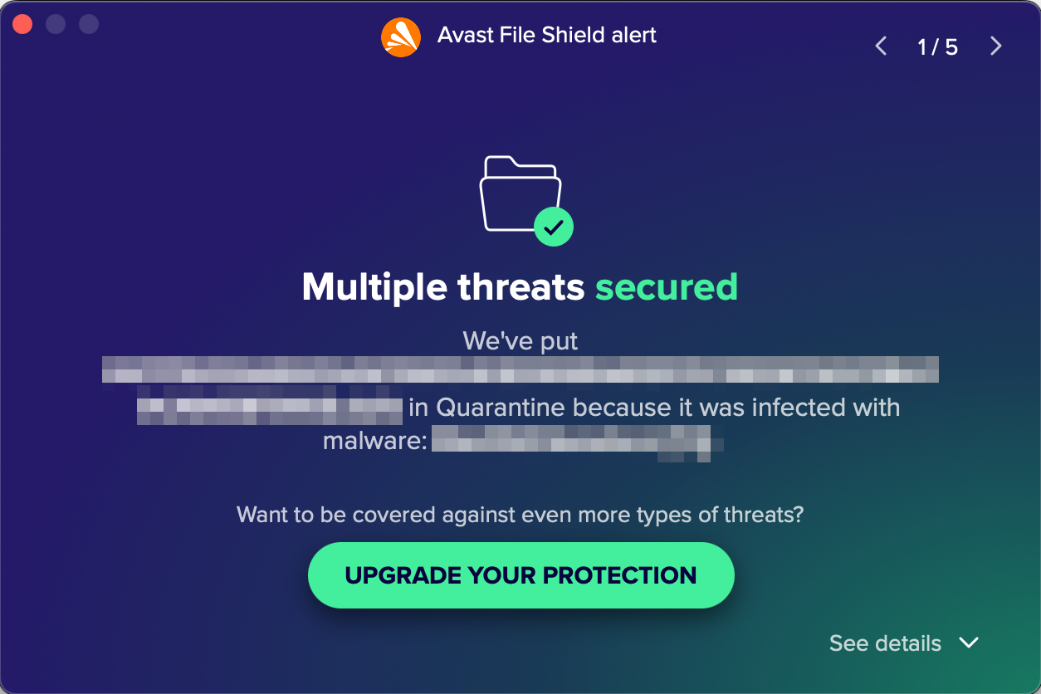
When malware was detected in our protection test, the program displayed the alert shown below. No user action was required, and the alert persisted until we closed it using the macOS close button in the top left-hand corner. We noted that multiple detections are combined into one single alert which you can browse through using the arrows in the top right-hand corner. Further details about the threat, such as the threat name, severity, file name/path, and process, are shown if the details section at the bottom of the alert is expanded.
Quarantine & Logs
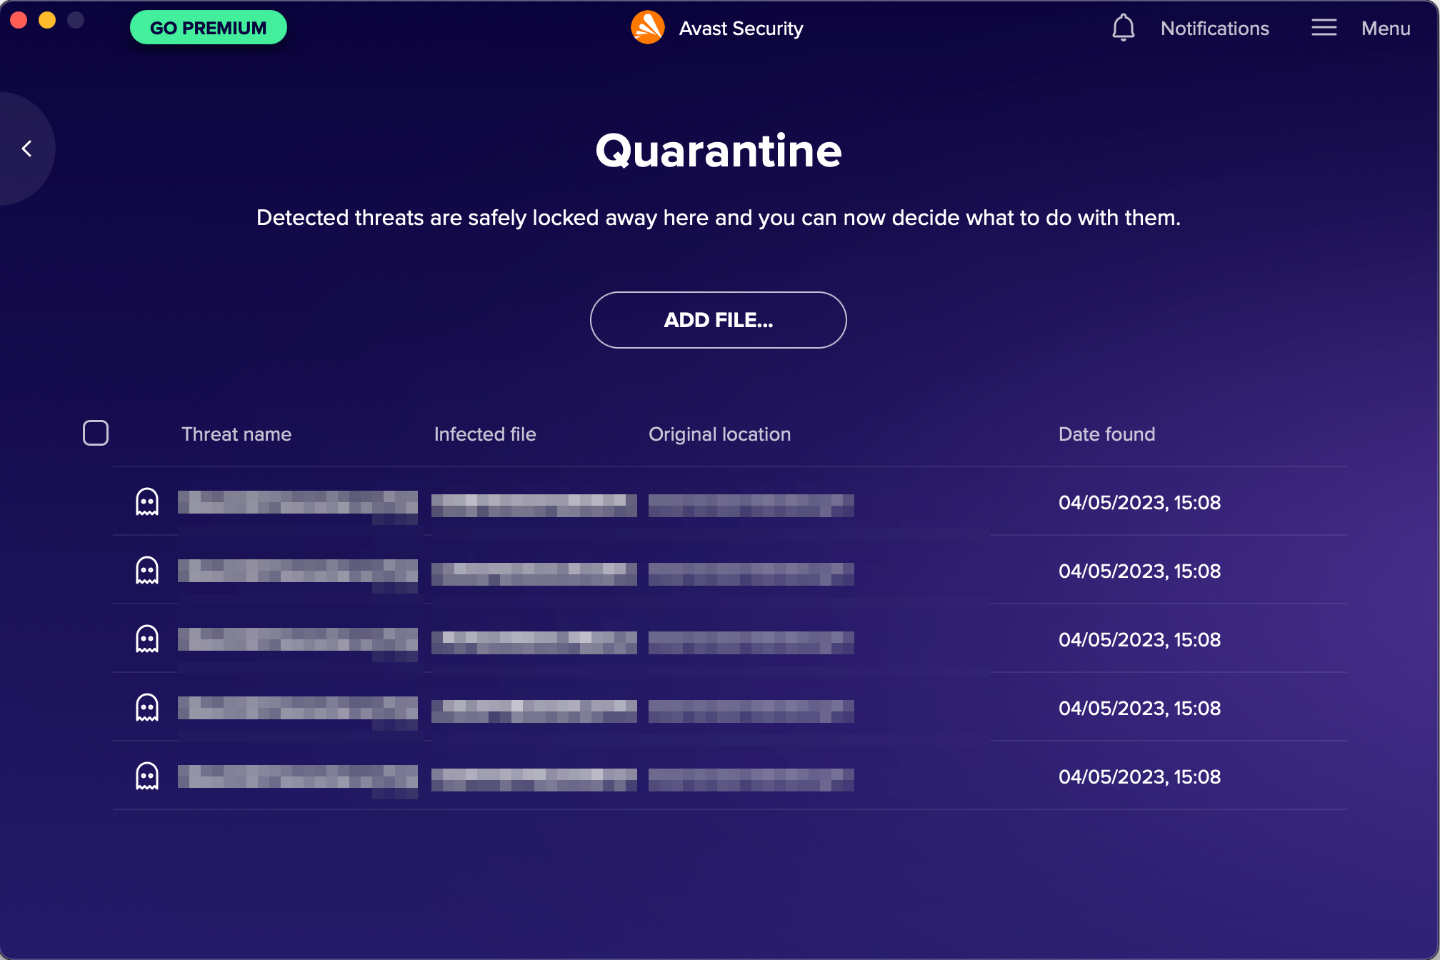
The quarantine is directly accessible from the home page of the main program window and lists files that have been quarantined, along with the threat name, file name, file path, and date when this happened. It allows you to delete or (with an administrator account) restore any/all items.
Advanced Options
Only users with a macOS Administrator account can perform the following tasks (caution is advised):
- Disable protection features (under Core Shields)
- Uninstall the program
- Restore items from the quarantine
Advertising
The Smart Scan feature promotes Avast’s paid-for security suites, Premium and Ultimate. At the end of the scan, it will display 3 “advanced issues”, namely vulnerability to ransomware, network threats and fake websites. If you click on Resolve All here, a purchase prompt for Avast Premium Security will be displayed. After dismissing the prompt, a second prompt appears offering a 60-day trial for Avast Ultimate. Clicking the Go Premium button on pages of other program features or the Upgrade your protection button of a detection alert leads to the same behaviour.
Summary
AVG AntiVirus Free for Mac is a free antivirus program and well suited to non-expert users. Some of its key aspects are:
- easy and straightforward installation and guided setup of core features
- most common features displayed in a clean and well-laid-out GUI
- different scan options and comprehensive settings, including scheduled scans
- clear and persistent alerts
- normal user accounts cannot take risky actions (e.g., disable protection, uninstall program)
Installation, Setup & Deinstallation
To set up AVG AntiVirus on your Mac, you just download and run the installer file from the vendor’s website. The initial setup is straightforward as the program guides you through step by step and provides brief explanations. You can uninstall the program by clicking AVG AntiVirus > Uninstall AVG AntiVirus in the macOS menu bar or opening the AVG AntiVirus Uninstaller directly from the macOS Applications folder.
General Handling & Essential Features
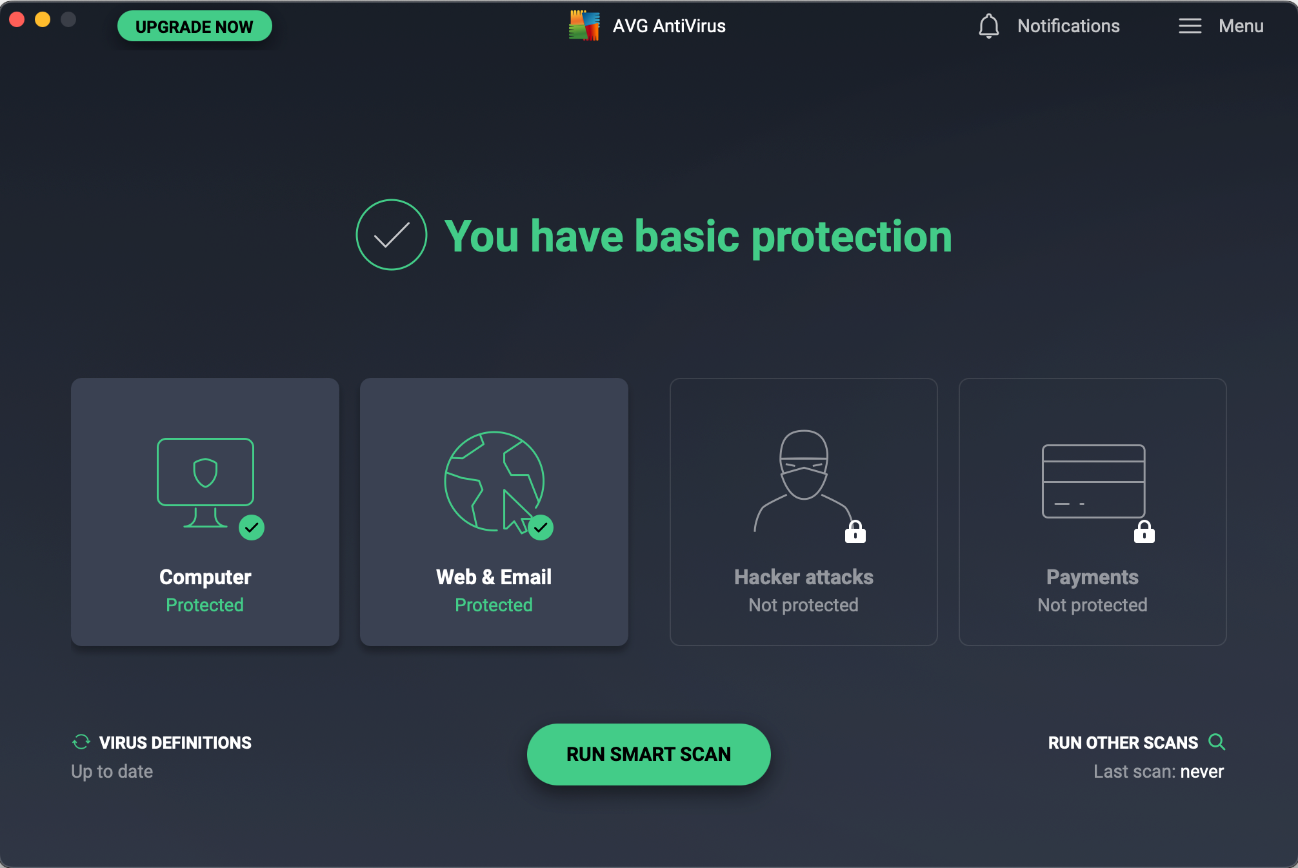
Protection status, smart scan, scan options (Run Other Scans), and protection features (Computer, Web & Email) are all found on the home page of the main program window. The quarantine is accessible from the Computer tile on the home page. Settings (Preferences) can be opened from the program menu in the top right-hand corner or the macOS menu bar. Subscription information is not applicable, as the program is free. A manual update can be triggered by clicking Virus Definitions on the home page, or clicking Check for Updates from the system tray icon or AVG AnitVirus in the macOS menu bar. The online help is accessible from the Help menu in the program menu which opens the support page in the default browser.
Protection
From Run Other Scans on the home page, you can start a smart scan, deep scan of all drives and the system memory, external storage scan of connected storage devices, or targeted scan of specific files or folders. The latter can also be run from e.g., the Finder context menu. Scheduled scans can be configured as well. The detection behaviour and settings of the different scan types can be changed from Preferences. The detection of PUA is enabled by default.
Alerts
When we disabled AVG’s real-time protection (File Shield) under Computer, web protection (Web Shield) or email protection (Email Shield) under Web & Email on the home page, an alert was shown in the main program window. To reactivate either protection feature, we had to manually go into the mentioned menu tiles and turn it back on.
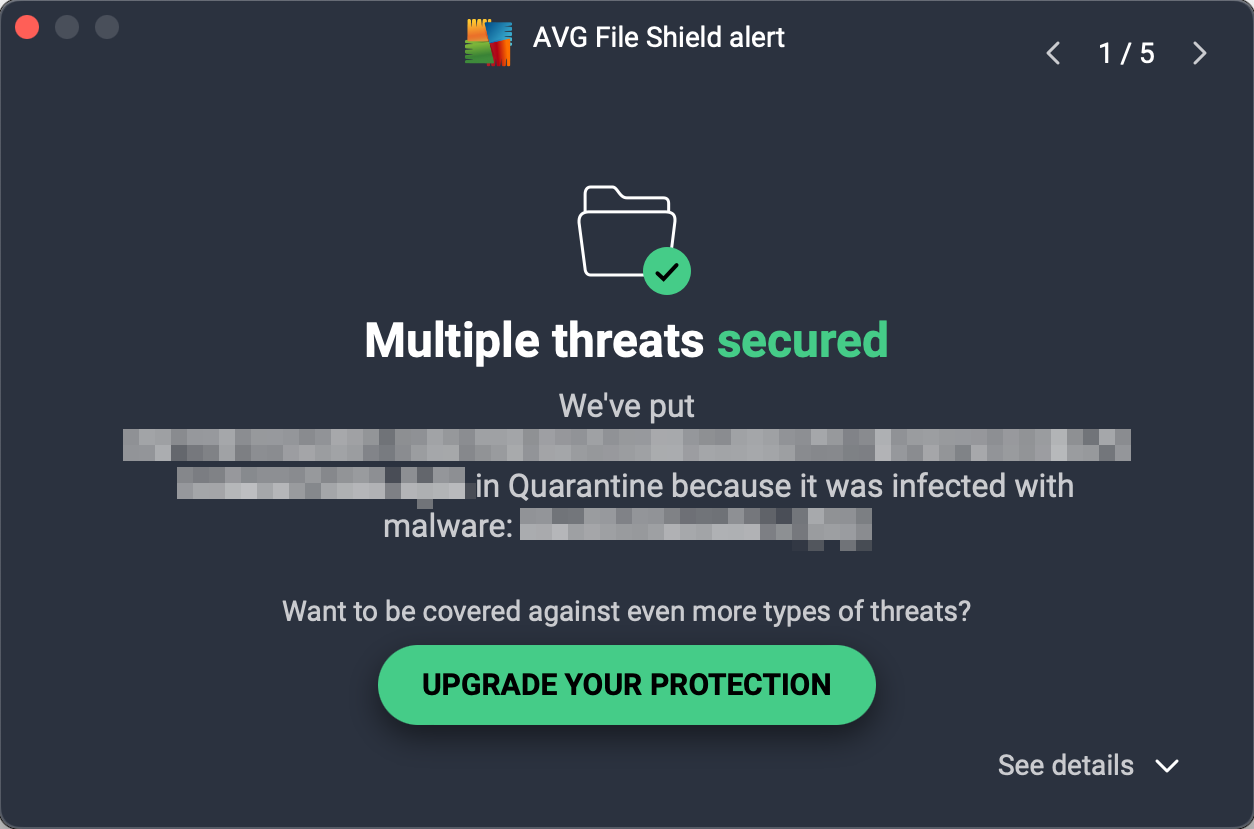
When malware was detected in our protection test, the program displayed the alert shown below. No user action was required, and the alert persisted until we closed it using the macOS close button in the top left-hand corner. We noted that multiple detections are combined into one single alert which you can browse through using the arrows in the top right-hand corner. Further details about the threat, such as the threat name, severity, file name/path, and process, are shown if the details section at the bottom of the alert is expanded.
Quarantine & Logs
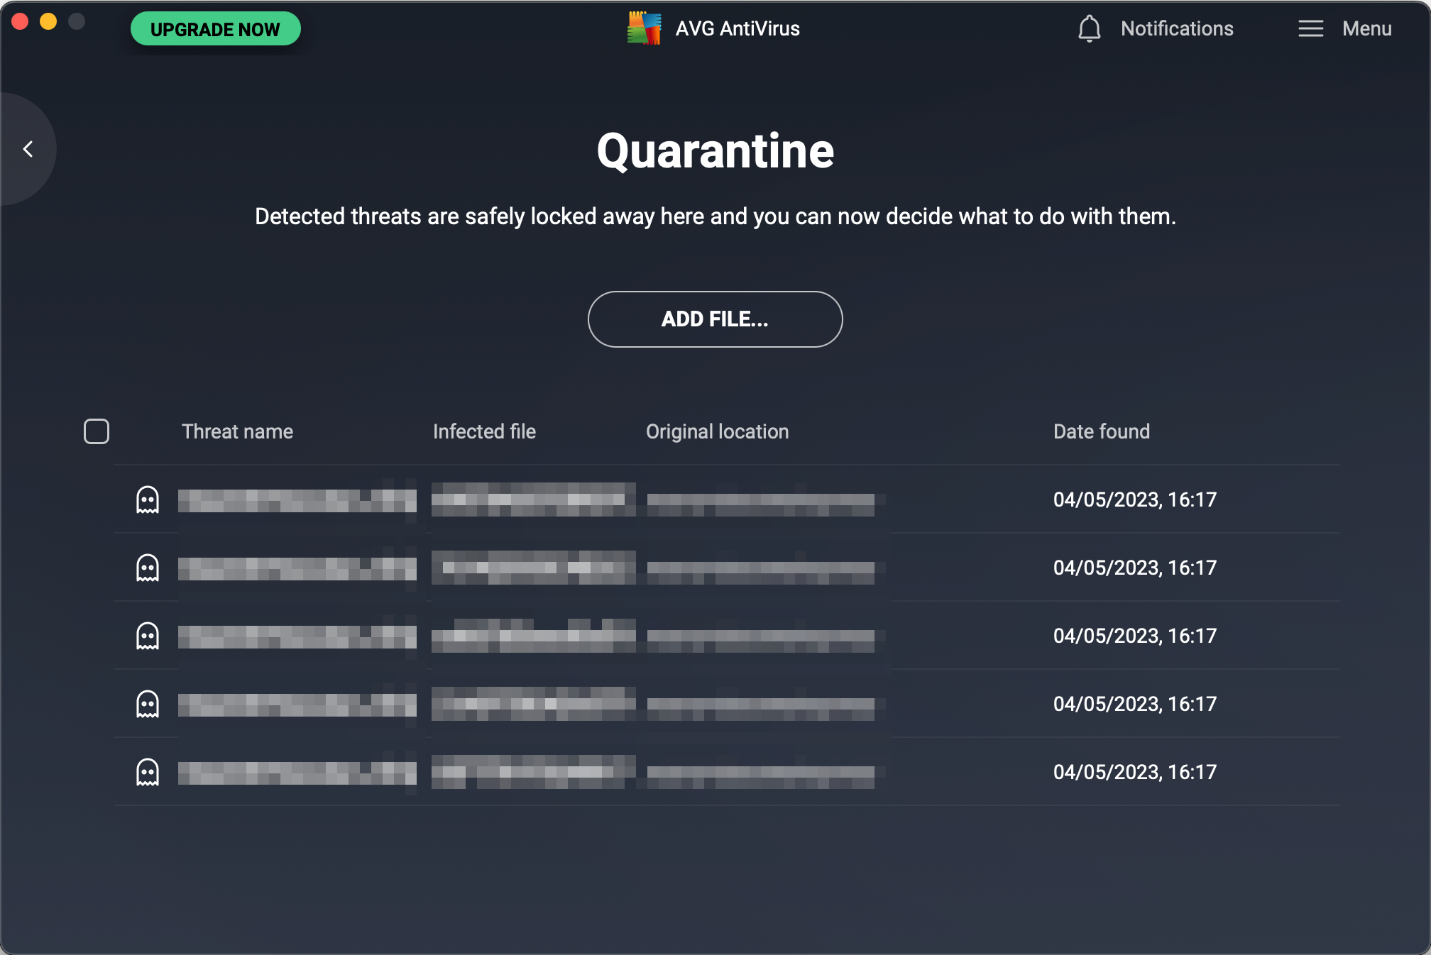
The quarantine is quickly accessible from Computer on the home page of the main program window and lists files that have been quarantined, along with the threat name, file name, file path, and date when this happened. It allows you to delete or (with an administrator account) restore any/all items.
Advanced Options
Only users with a macOS Administrator account can perform the following tasks (caution is advised):
- Disable protection features (under Computer and Web & Emails)
- Uninstall the program
- Restore items from the quarantine
Advertising
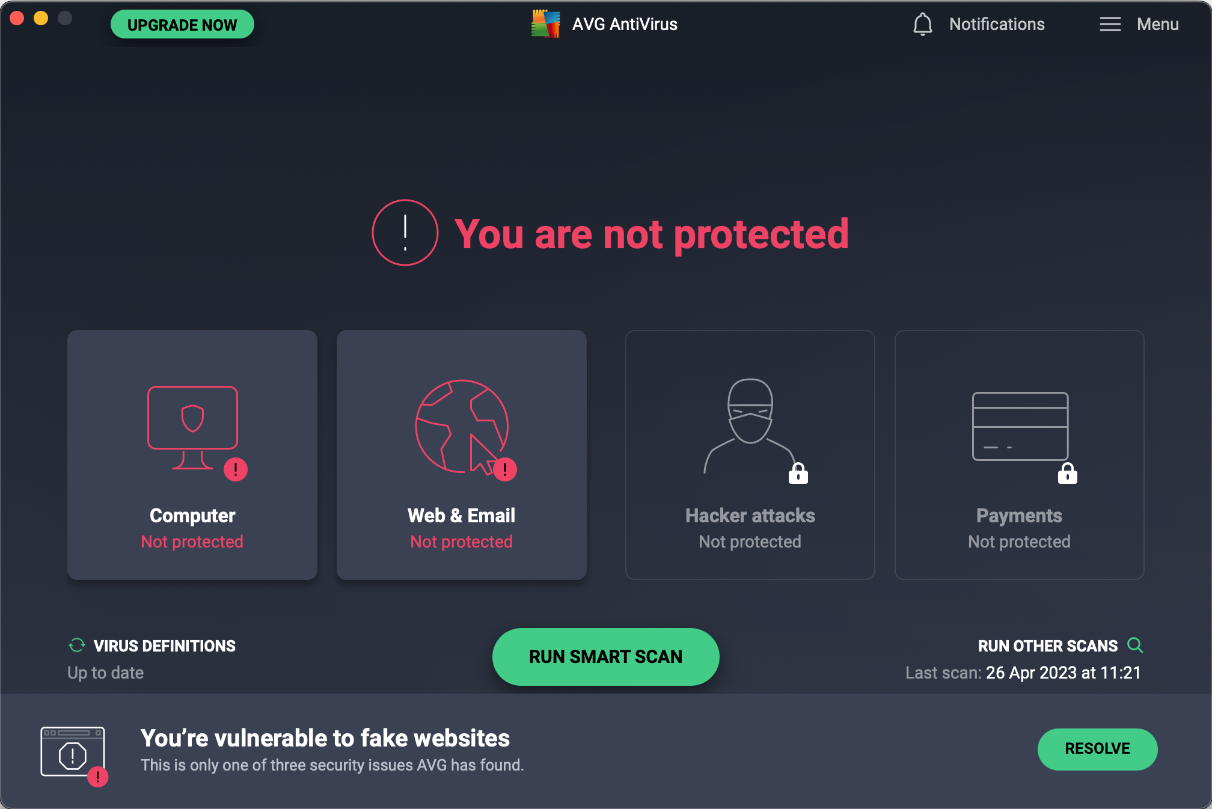
The Smart Scan feature promotes AVG’s paid-for security suite, Internet Security. At the end of the scan, it will display 3 “advanced issues”, namely vulnerability to ransomware, network threats and fake websites. If you click on Resolve All here, a purchase prompt for AVG Internet Security will be displayed. After dismissing the prompt, a second prompt appears offering a 60-day trial for it. Clicking the Go Premium button on pages of other program features or the Upgrade Your Protection button of a detection alert leads to the same behaviour.
Summary
Avira Prime for Mac is a paid-for antivirus program and an excellent choice for non-expert users. Some of its key aspects are:
- simple and straightforward installation and guided setup of core features
- all available features displayed in a well-organized and neat interface
- different scan options and many settings, including scheduled scans and automatic USB scan
- clear alerts
- normal user accounts cannot take risky actions (e.g., disable protection, uninstall program)
Installation, Setup & Deinstallation
To set up Avira Prime for Mac, you need to log in to your Avira account, download and run the installer. The initial setup is straightforward as the program guides you through step by step and provides brief explanations. When the program window opens for the first time, you are prompted to run a Smart Scan. The program can be uninstalled by deleting it from the macOS Applications folder. The program’s window has both dark and light modes, which co-ordinate with the dark- and light-mode settings of macOS.
General Handling & Essential Features
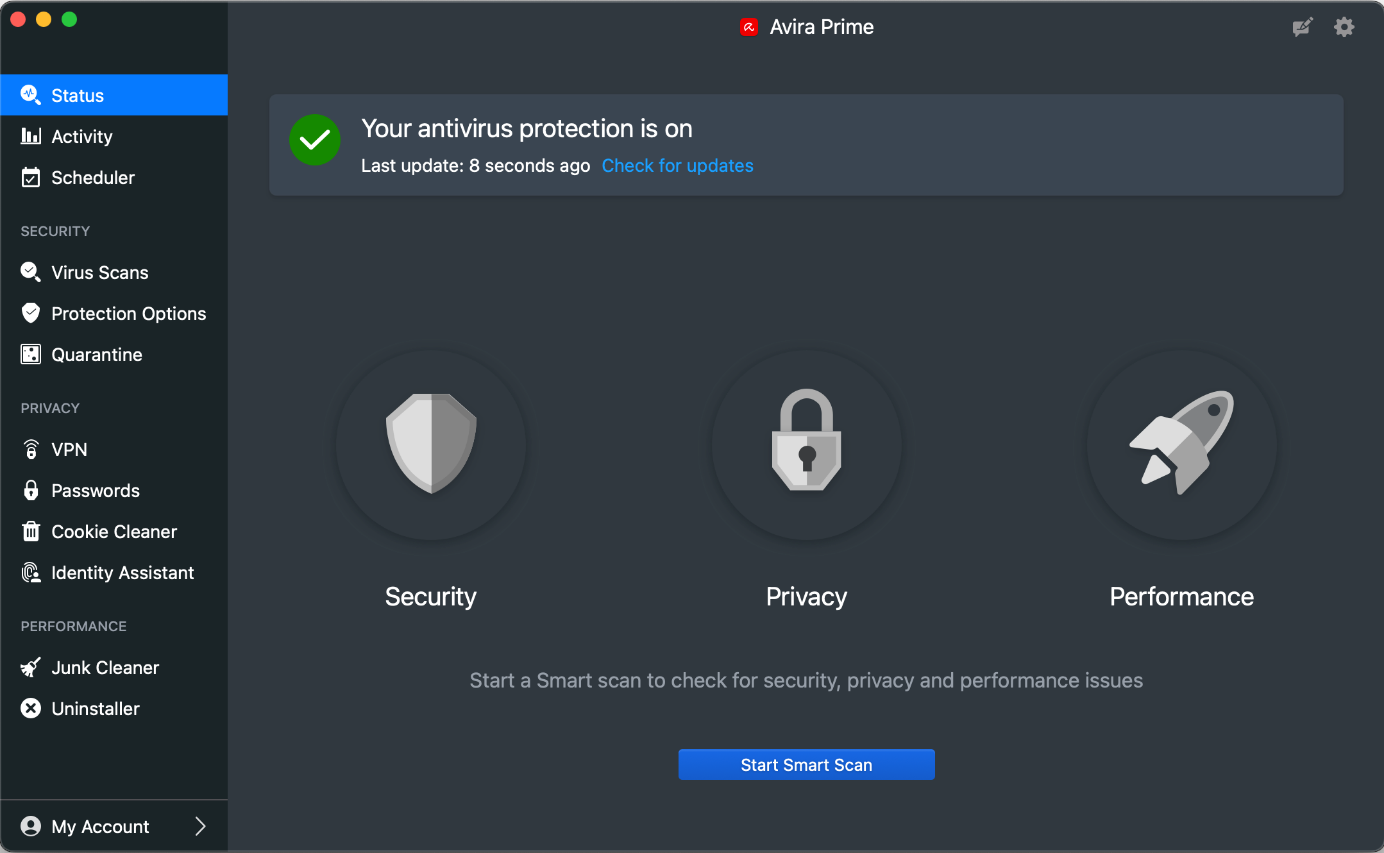
Protection status, smart scan, scan options (Virus Scans), protection features (Protection Options), quarantine, and subscription information (My Account) can all be accessed from the main program window. Settings can be accessed from the cogwheel icon in the top right-hand corner of the window or the macOS menu bar. A manual update can be triggered by clicking Check for updates on the main program window. The online help is found in the Help menu in the macOS menu bar which opens the support page in the default browser.
Protection
From Virus Scans, you can start a quick scan of the most vulnerable device areas, full scan of the entire file system, or custom scan of selected files or folders. The latter can also be run from e.g., the Finder context menu. The Scheduler lets you define individual schedules of all the available scan options to run them regularly. The automatic scan of USB devices can be activated or deactivated from the Protection Options. From Settings, the detection behaviour and different scan settings can be changed.
Alerts
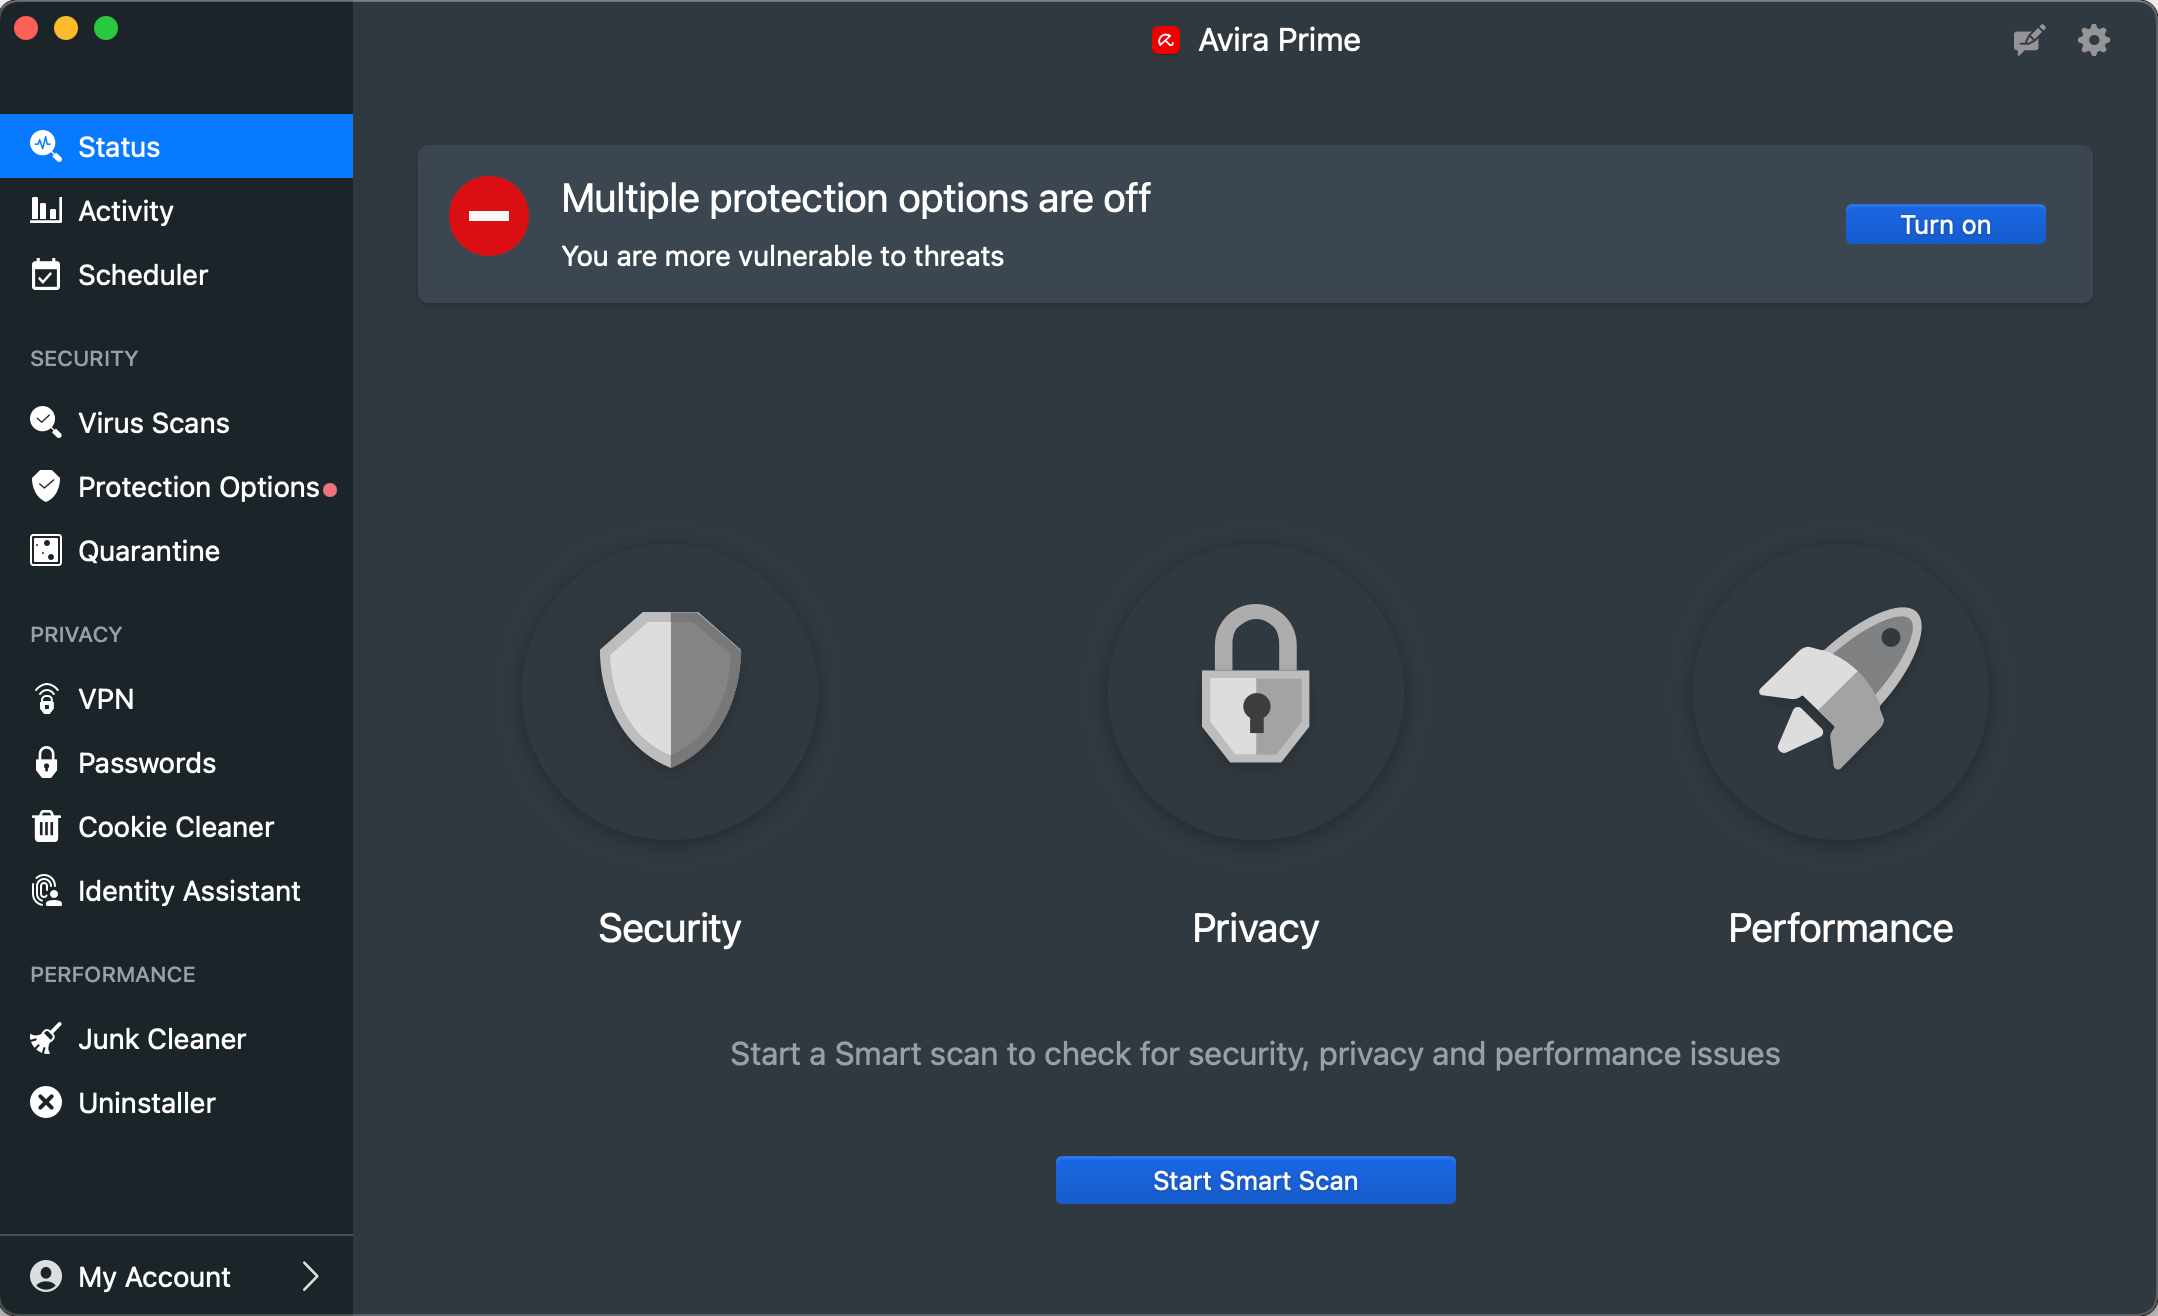
When we disabled Avira’s real-time protection or download protection under Protection Options, the alert below was shown in the main program window. The real-time protection can also be turned off via the system tray icon in the macOS menu bar. We were able to easily reactivate the protection by clicking Turn on.
When malware was detected in our protection test, the program displayed an alert in the form of a system notification shown below, including the file path where the threat was found and the action taken. No user action was required, and the alert closed automatically after a few seconds.
Quarantine & Logs
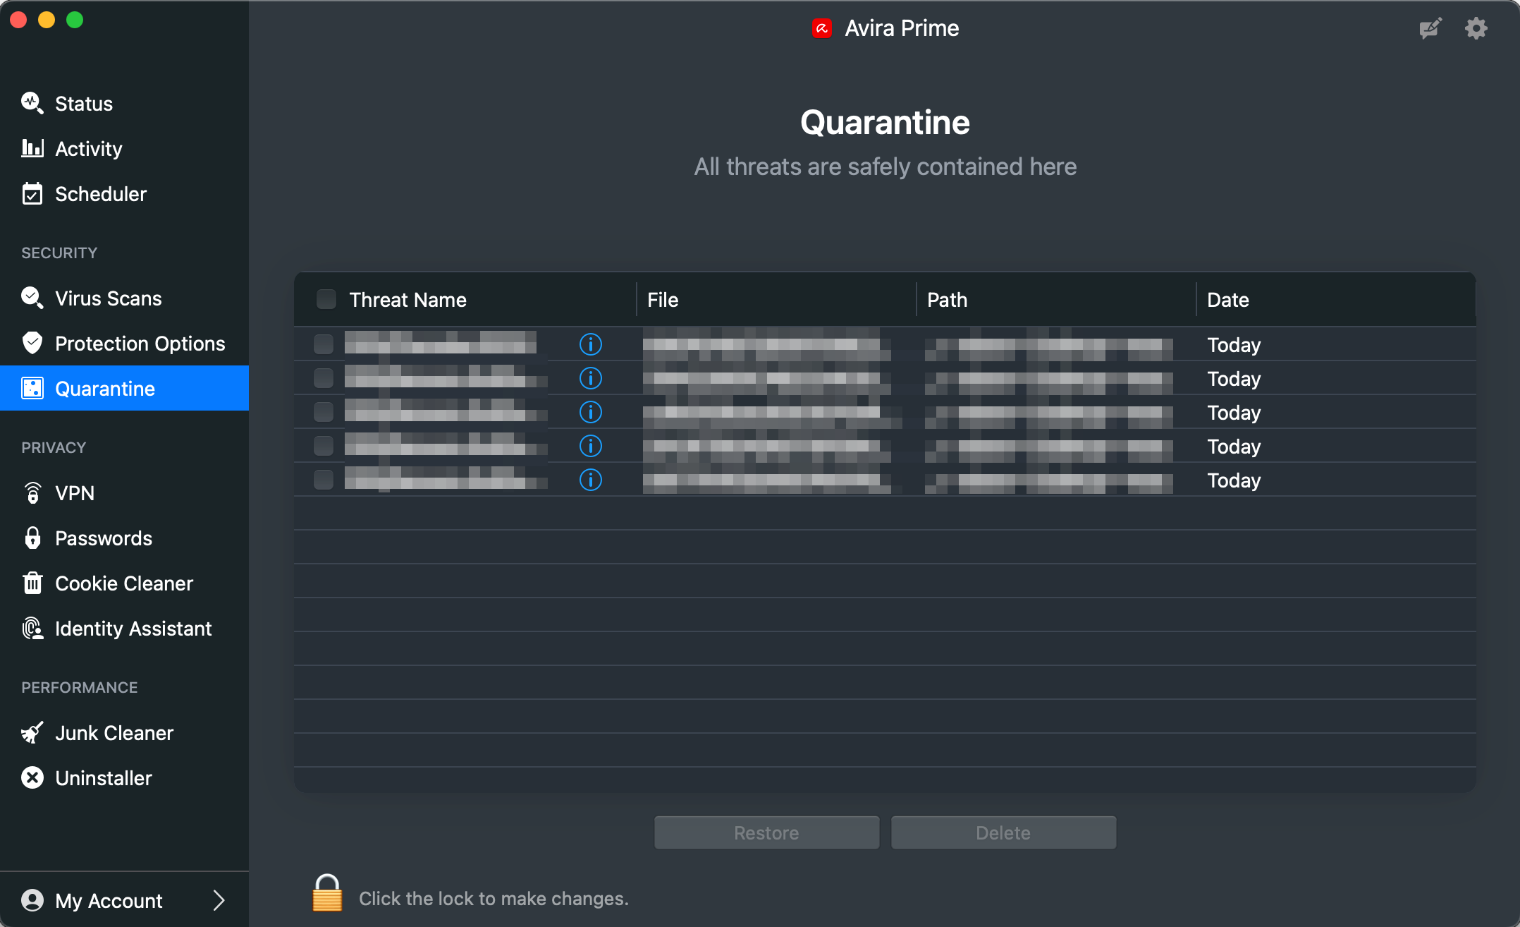
The Quarantine page of the program (screenshot below) shows you all the items that have been quarantined, along with the threat name, file name, file path, and date when this happened. There are options to delete and restore any of the detected files (you have to enter administrator credentials to take either action).
Advanced options
Only users with a macOS Administrator account can perform the following tasks (caution is advised):
- Disable protection features (under Protection Options or system tray icon)
- Uninstall the program
- Delete and restore items from quarantine
Summary
Bitdefender Antivirus for Mac is a paid-for antivirus program which both expert and non-expert users should find suitable for their needs. Some of its key aspects are:
- simple and straightforward installation and guided setup of core features
- all available features displayed in a very well-designed interface
- different scan options, ransomware protection, data-limited VPN, browsing-protection add-ins
- clear in-program alerts but none shown in case of a malware detection
- normal user accounts cannot take risky actions (e.g., disable protection, uninstall program)
Installation, Setup & Deinstallation
After downloading and running the installer from the vendor’s website, the setup wizard guides you through each installation and configuration step. When setup is complete, you need to create a Bitdefender account and sign in. An optional introductory tour then starts, after which the program window displays several recommendations, such as installing the browser extension for Safari/Chrome/Firefox (Traffic Light), configuring the ransomware protection feature (Safe Files), setting up Time Machine Protection, and running a system scan. The program can be uninstalled by opening the Bitdefender Uninstaller, which is found inside the Bitdefender folder of the macOS Applications folder. The program’s window has both dark and light modes, which co-ordinate with the dark- and light-mode settings of macOS.
General Handling & Essential Features
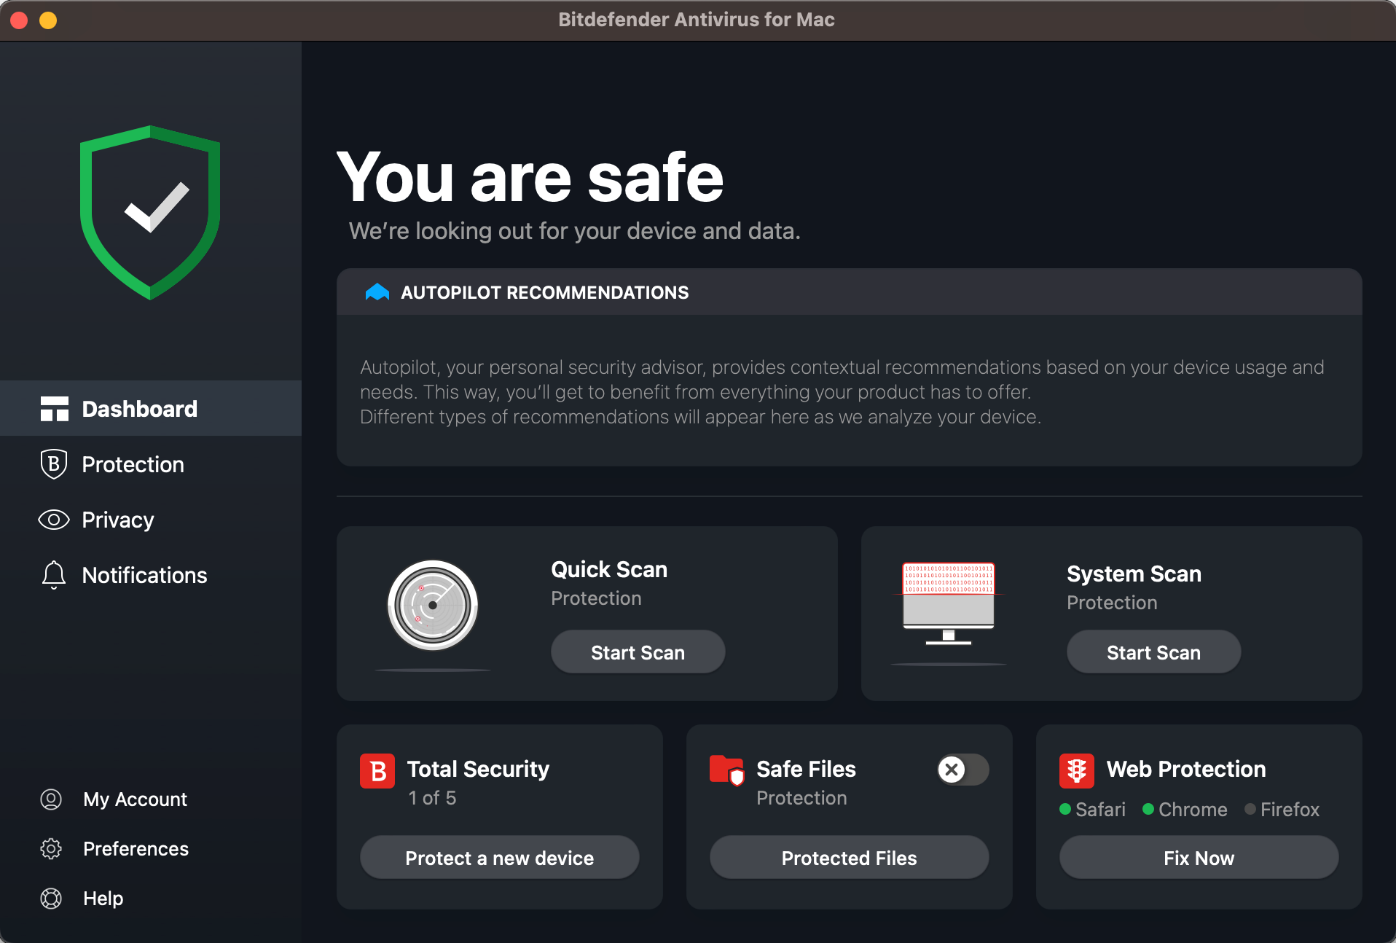
Protection status, scan options (quick and system scan), protection features, settings (Preferences), subscription information (My Account), and help are all directly accessible from the program’s Dashboard. The quarantine and list of scan exceptions can be found under Protection. A manual update can be triggered from the Actions menu in the macOS menu bar. The data-limited Bitdefender VPN as well as additional Anti-tracker browser extensions are available under Privacy. From Help, you can open a very comprehensive manual in PDF format or the support page in the default browser.
Protection
From Protection, you can start a quick scan of critical areas, system scan of all files and directories, or custom scan of specific files or folders. The latter can also be run from e.g., the Finder context menu. Settings for the ransomware protection are available as well. The program’s protection and detection behaviour can be changed from Preferences. If you install the Traffic Light browser extension, safety ratings (indicated by coloured symbols) are added to Google search results.
Alerts
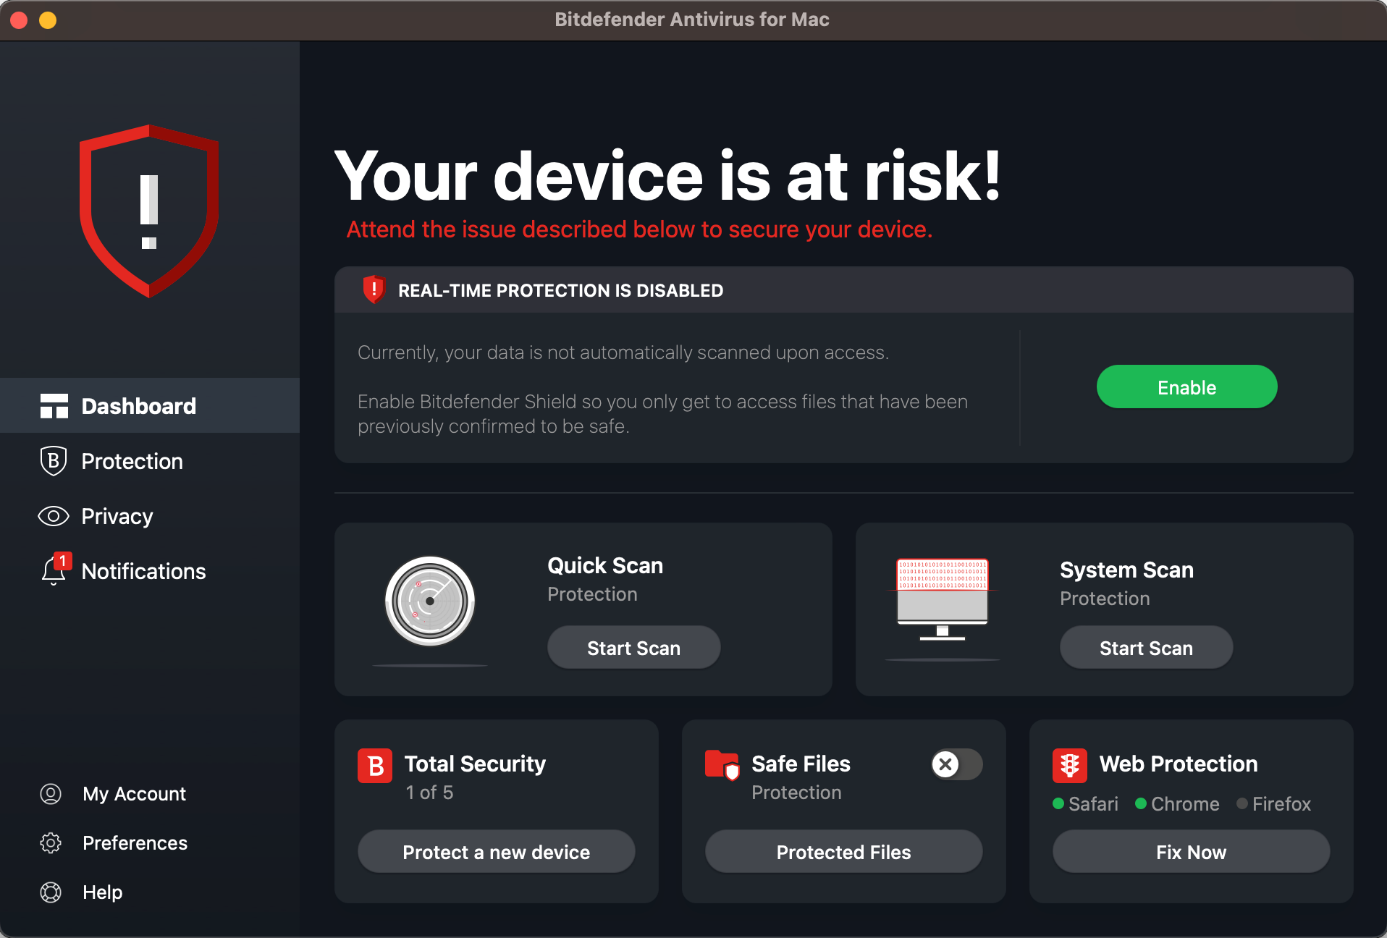
When we disabled Bitdefender’s real-time protection via Preferences or the system tray icon in the macOS menu bar, the alert below was shown in the main program window. We were able to reactivate the protection easily by clicking Enable.
When malware was detected in our protection test, the program silently took action on the threat (e.g., immediately deleted it) as the system tray icon briefly changed upon detection. After manually opening the main program window, the detections appeared on the Notifications page. Apart from that, no clear detection alerts were shown.
When verifying the Notifications permission in the macOS system settings, we noticed that the notifications were allowed for Bitdefender Antivirus for Mac but the option was set to None by default. After changing it to Banners and re-running the protection test, the program displayed an alert in the form of a system notification shown below, including the threat name, file name, and action taken. No user action was required, and the alert closed automatically after a few seconds. However, the program did not give any hint during installation or usage about enabling notifications in the macOS system settings.
Quarantine & Logs
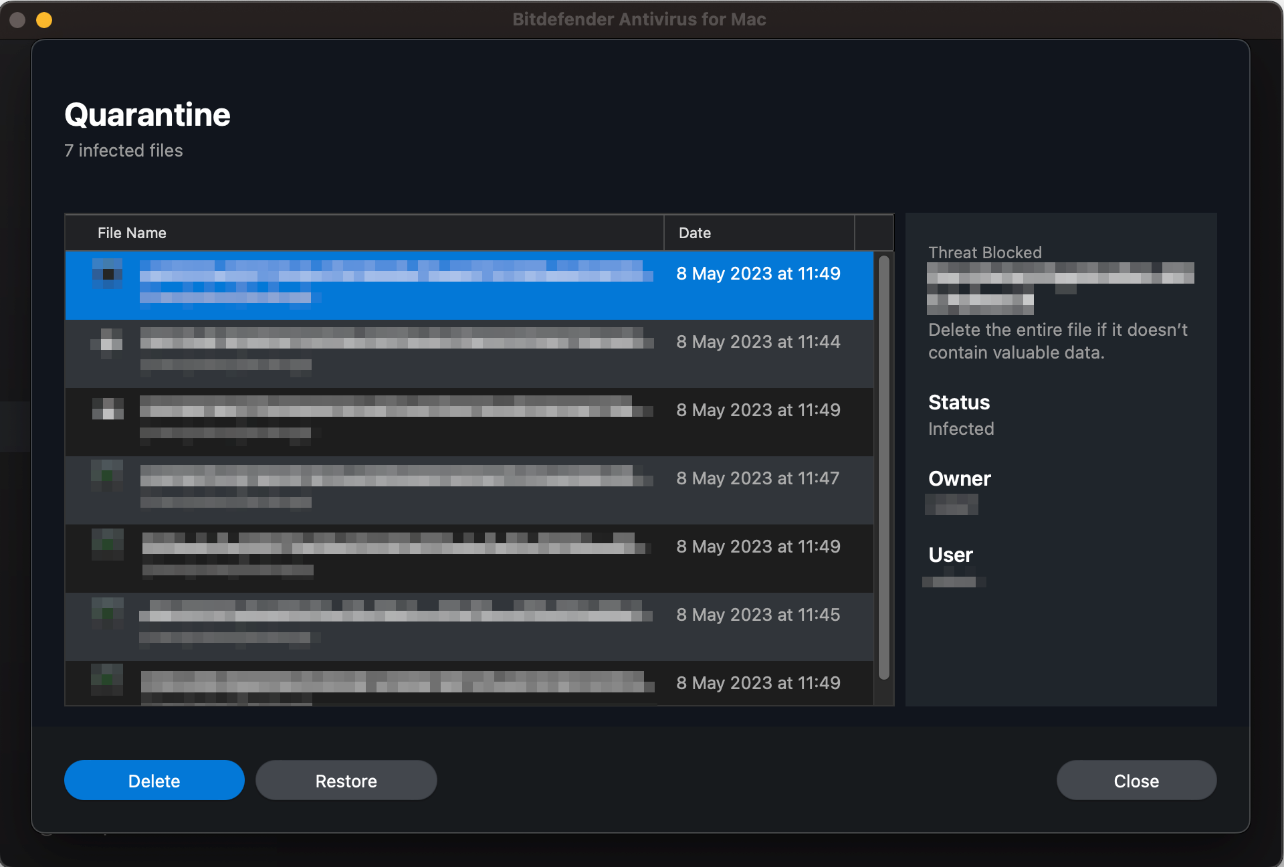
The Quarantine page of the program (screenshot below) lets you view all the items that have been quarantined, along with the threat name, file name, and date when the this happened. There are options to delete and restore any of the detected files (you have to enter administrator credentials to take either action). Notifications is the log feature which displays events such as updates, component activation, and malware detections. These can be displayed all together, or filtered by importance (Critical, Warning, Information).
Advanced Options
Only users with a macOS Administrator account can perform the following tasks (caution is advised):
- Disable protection features (under Preferences)
- Uninstall the program
- Delete and restore items from quarantine
Summary
CrowdStrike Falcon Pro is a security package suitable for medium- to large-sized enterprise networks and provides a cloud-based console for managing the endpoint protection software. Some of its key aspects are:
- investigative functions for analysing and remediating attacks
- comprehensive search facilities
- well-organized cloud-based console with easy access to details pages
- encyclopaedia of known cybercriminal groups
- clear alerts at endpoint
Management Console
The console is navigated from the menu in the top left-hand corner of the console. This lists different sections, such as Endpoint security, Threat intelligence, Investigate, Dashboards and reports, and Host setup and management, which group the individual pages. We will describe the most relevant sections and pages below. You can easily bookmark any page (using the bookmark symbol next to the page title at the top of the page), and then go directly to that page using the Bookmarks section of the menu.
Endpoint security > Activity dashboard page
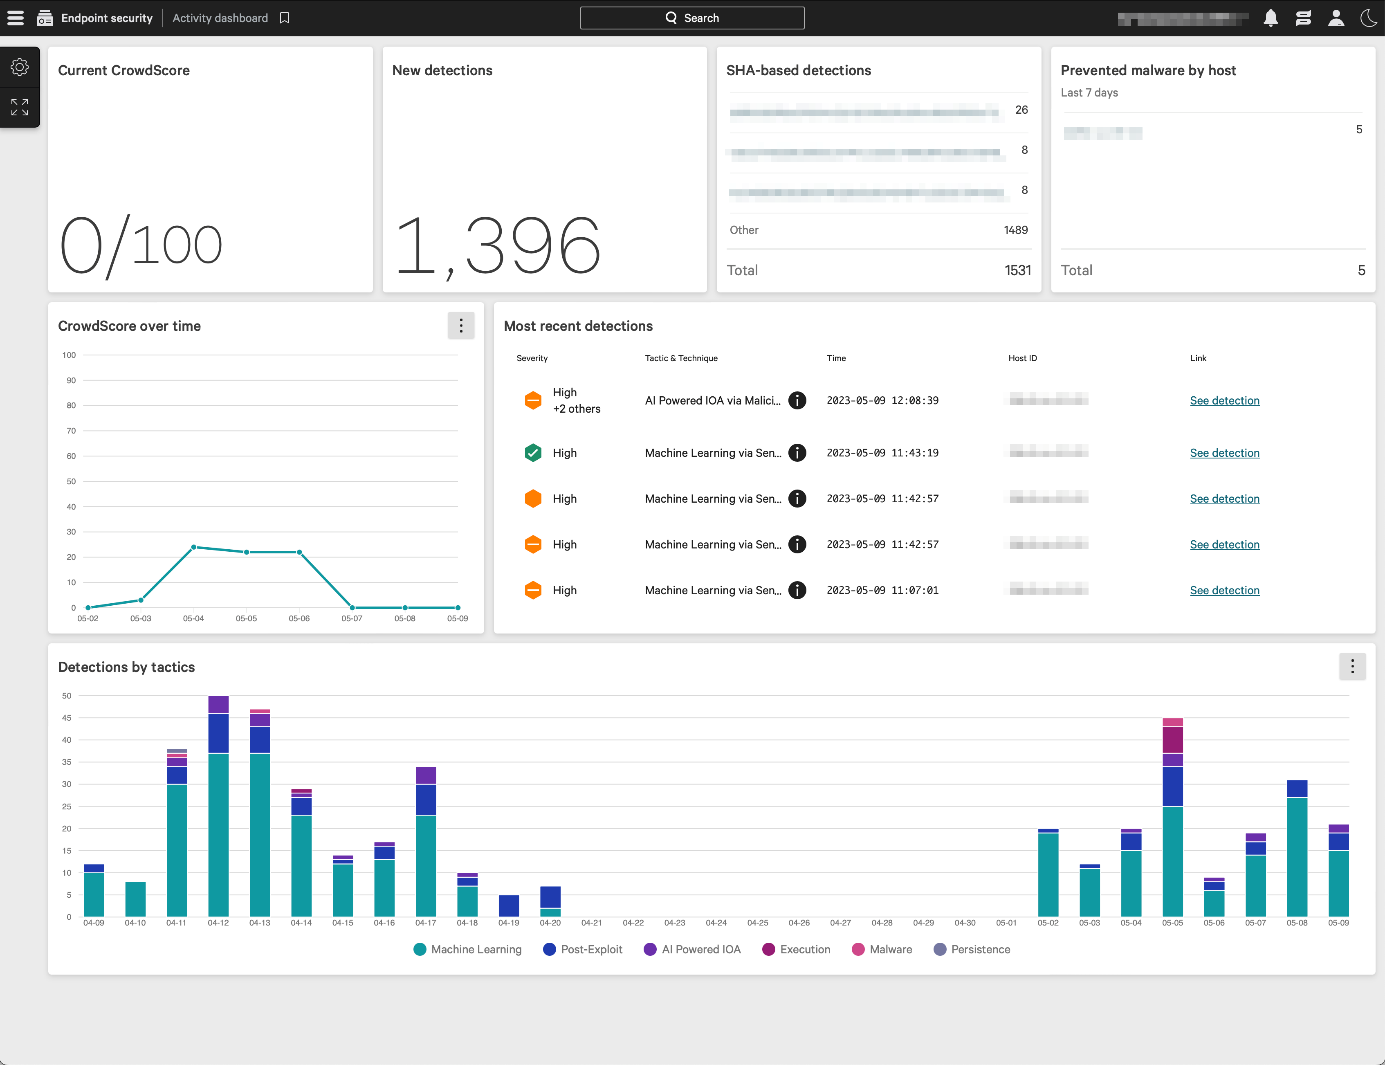
This is the page you see when you first log on to the console. It shows various status items in large panels (screenshot above). There is a list of most recent detections, with a graphical severity rating. You can also see a graph of detections by tactic (e.g., Machine learning, Defense Evasion) over the past month. Terms from the MITRE ATT&CK Framework are used to show attack stages here. The New detections, SHA-based detections, and Prevented malware by host panels redirect to the Endpoint detections details page with the respective filters applied.
Endpoint security > Endpoint detections page
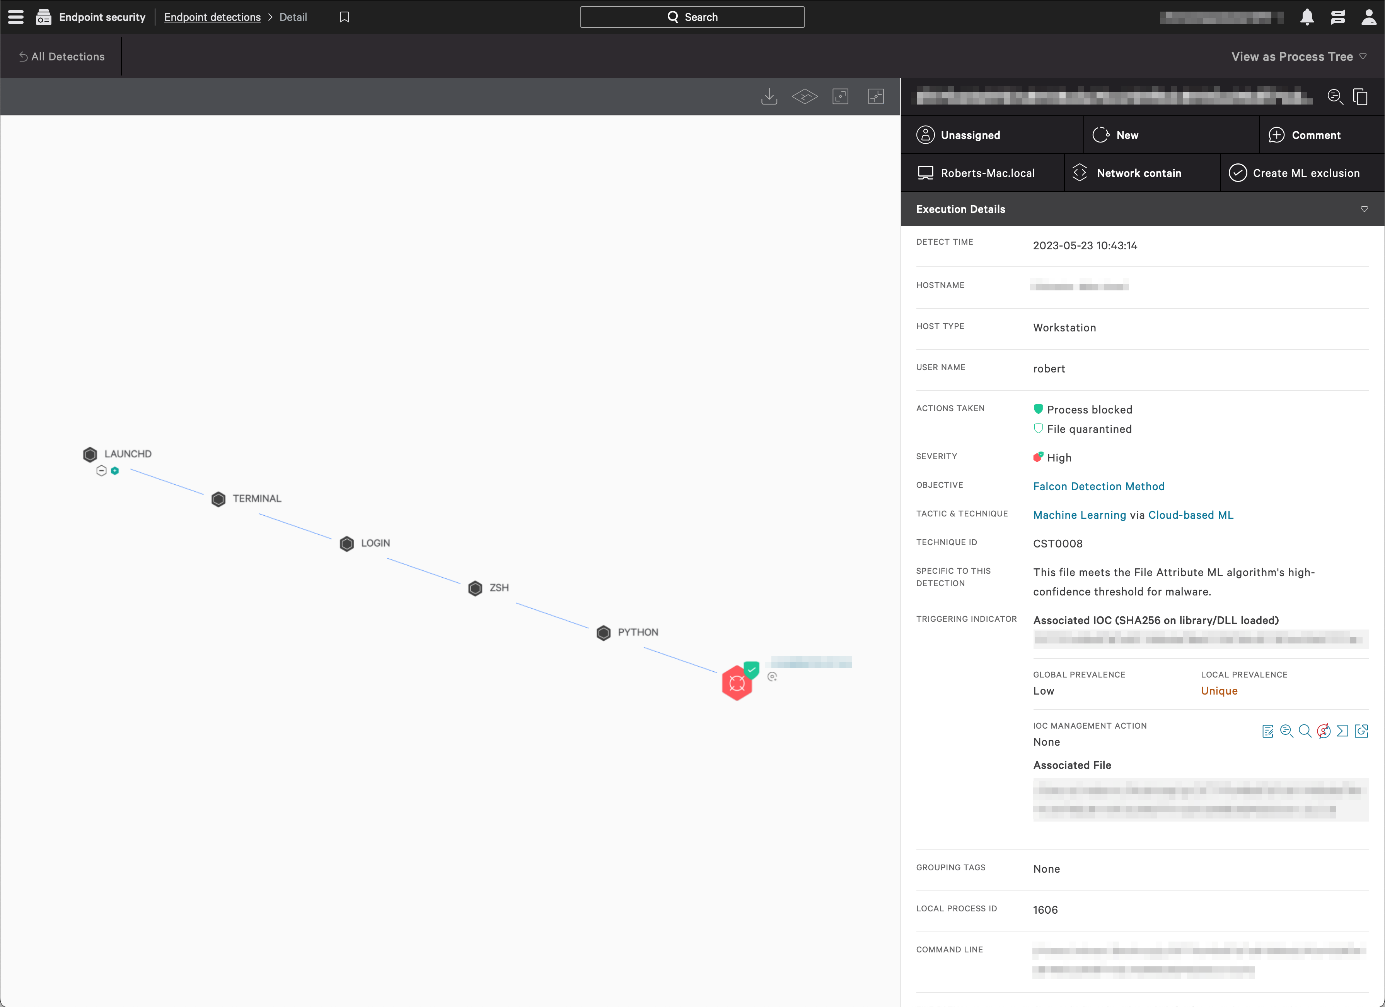
Here you can search a list of threat detections using a wide range of criteria. These include severity, malware tactics, detection technique, date and time, affected host, and logged-on user. For each detection, you can see full details, including a process tree view (screenshot below), and assign a console user for remediation.
Endpoint security > Quarantined files page
This page lets you see files that have been quarantined by the endpoint protection client. For each item, you can see the date and time when it was quarantined, file name, device name, number of AV detections, logged-on user, and its status. Quarantined files can be released, deleted, or downloaded in a password-protected archive. Clicking the entry of a quarantined file opens a panel with additional information, such as the file path, file hashes, file size, file type, detection method, and severity. There is a search function and a variety of filters you can apply to find specific files within the quarantine repository.
Endpoint security > Prevention policies page
Here you can create and edit the prevention policies for the supported OS endpoints. You can define the capabilities of the endpoint protection client for different types of attack-, detection-, and protection-related behaviour. In the case of Mac policies, you can configure components such as Enhanced Visibility, Quarantine, Execution Blocking, Unauthorized Remote Access, and Credential Dumping. Some sensor components, such as Cloud Machine Learning and Sensor Machine Learning, have separate configurable sensitivity levels for detection and prevention, ranging from Disabled to Extra Aggressive. Custom Indicators of Attack (IOA) can be created and assigned too. Policies can be assigned to devices automatically by means of a naming system, whereby a policy hierarchy determines which one takes precedence. For example, any device with “Mac” in its name can be automatically put into a specific group of Mac computers, to which one or more policies are assigned.
Host setup and management > Host management page
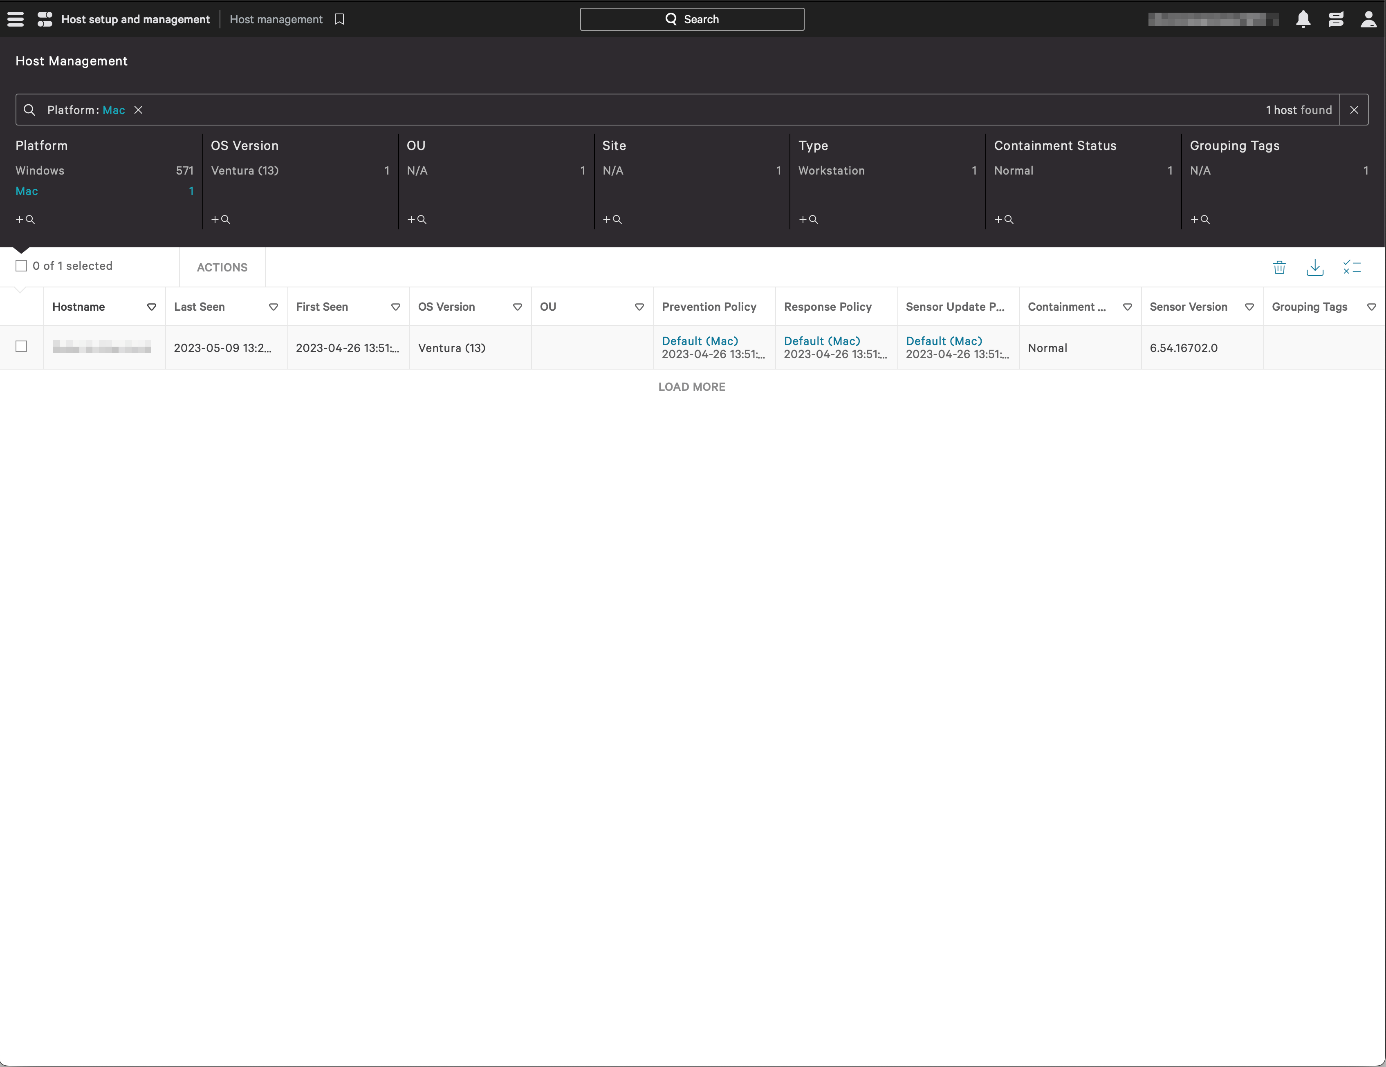
This page lists all the registered devices/hosts along with the host status, operating system, policy assignments, containment status, sensor version, and first/last seen date. Clicking on an entry opens a panel with additional details, such as device manufacturer, MAC address, IP addresses, and serial number. Like in other details pages, you can apply many different filters and search for specific hosts.
Threat intelligence > Actors page
This page provides details of known cybercriminal groups. You can see the nations and industries that each one has targeted, along with technical details of the attack methods used. CrowdStrike told us that this information is also available in Endpoint detections details when a detection is associated with a specific actor.
Investigate section
The Investigate section provides an extremely comprehensive search facility. It lets you search for specific aspects (e.g., hosts, hashes, users, IP addresses, domains, events), hunt for activities related to detections, files, or executables, view timelines of hosts, processes, and users, check reports about remote access, network logon, and geo location activities, and look for custom alerts and vulnerabilities (e.g., HiveNightmare, Log4Shell).
Endpoint Protection Client
Deployment
Installer files for the endpoint protection client (Sensor) can be downloaded from Host setup and management > Sensor downloads. Half a dozen older versions of the sensor are also available. Local installation requires the use of the macOS Terminal – instructions are provided in the documentation (Support and resources > Documentation).
General Handling
No graphical user interface is provided. Only users with a macOS Administrator account can interact with the sensor using its command-line interface (falconctl) via the macOS Terminal. For example, you can output sensor information and statistics (falconctl stats), load/unload the sensor (falconctl load / falconctl unload), and uninstall the sensor (falconctl uninstall). With the settings used for this test, detected files are not deleted but quarantined in situ.
Alerts
When malware was detected in our protection test, the sensor displayed an alert in the form of a system notification shown below, without further details about the threat. No user action was required, and the alert closed automatically after a few seconds.
Summary
Intego Mac Internet Security X9 is a paid-for antivirus program and a good choice for non-expert users. In addition to anti-malware features, it also includes a separate firewall application, called NetBarrier. In this review though, we have focused on the antivirus application, VirusBarrier. Some of its key aspects are:
- simple and straightforward installation and setup of core features
- all available features displayed in a clean GUI
- different scan options, including scheduled scans and scans of mounted volumes
- clear and persistent alerts
- normal user accounts cannot take risky actions (e.g., disable protection, uninstall program)
Installation, Setup & Deinstallation
To set up Mac Internet Security X9, you just need to download and run the installer from the vendor’s website. The setup wizard is straightforward however, you have to manually open the program after installation. After that, you will be prompted to activate the product and allow the program Full Disk Access in the macOS system settings. The program can be uninstalled by re-running the installer and double-clicking Uninstall, or by deleting the Intego folder from the macOS Applications folder. The program’s window has both dark and light modes, which co-ordinate with the dark- and light-mode settings of macOS.
General Handling & Essential Features
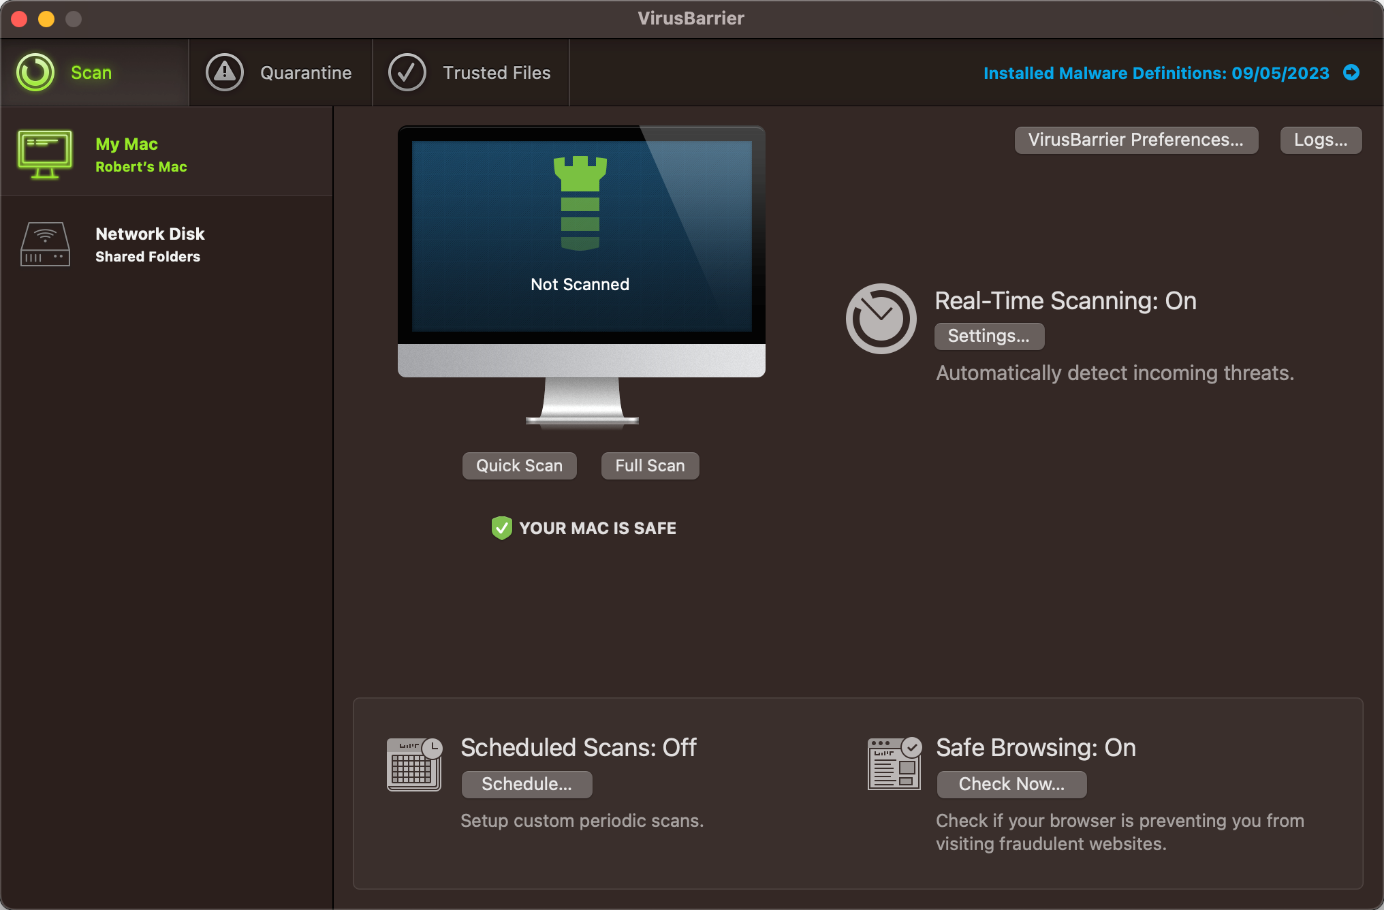
Protection status, scan options (quick, full, scheduled scan), quarantine, list of scan exceptions (Trusted Files), and settings are all found on the Scan page of the main program window. A manual update can be triggered by clicking on the Malware Definitions link on the Scan page, or by selecting Check for Updates under the VirusBarrier menu or the system tray icon in the macOS menu bar. In all cases, the NetUpdate application opens which displays the update status, along with the days after which the protection expires, and related settings. The subscription information can be viewed in the About box of the VirusBarrier menu. The online help is found in the Help menu in the macOS menu bar which opens the support page in the default browser. Additionally, a basic help displays an overlay that explains the principal features in the main program window.
Protection
From the Scan page of the main program window or the File menu in the macOS menu bar, you can start a quick scan, full scan, or custom scan of specific files or folders. The latter can also be run from e.g., the Finder context menu. The automatic scan of volumes when they are mounted can be activated in Settings. On the Scan page, you can also configure scheduled scans (Schedule) as well as the program’s protection and detection behaviour (VirusBarrier Preferences). The program checks if the safe browsing feature of supported browsers (Safari, Chrome, Firefox) is enabled and warns you in case it is turned off. VirusBarrier uses Intego’s own detection engine to detect macOS malware but makes use of the Avira engine to detect Windows malware.
Alerts
When we disabled Intego’s real-time protection on the Scan page, the alert below was shown in the main program window. We were able to reactivate the protection easily by clicking Turn On.
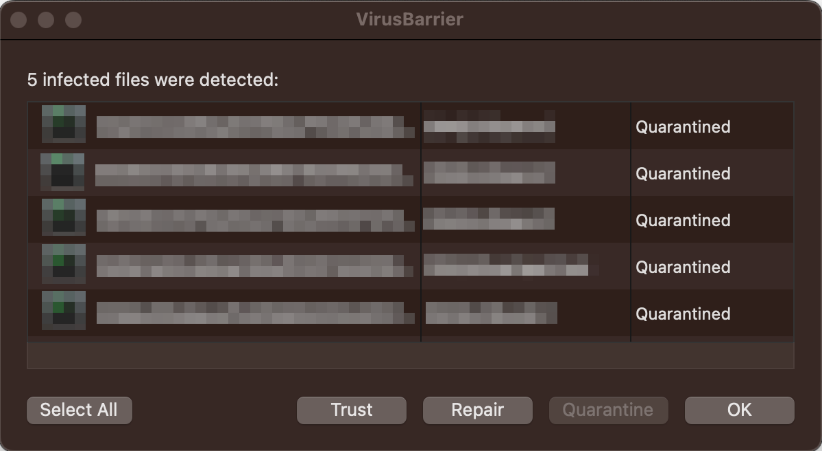
When malware was detected in our protection test, the program showed the dialog and an alert in the form of a system notification, including the file name and action taken, shown below. No user action was required. The dialog persisted until we closed it and the alert closed automatically after a few seconds.
Quarantine & Logs
The Quarantine page of the program (screenshot below) shows you all the items that have been quarantined. There are options to delete, repair, or restore (trust) a single or all the quarantined files. If you click on an individual item, the path to its location will be shown in the status bar at the bottom.
Logs on the Scan page displays a list of all system events, including updates, scan and real-time detections, real-time protection status, and items added to or deleted from quarantine. The applicable date and time are shown, along with a traffic-light colour-coding system for each item. Malware finds are thus shown as red, quarantine actions as yellow, and enabling real-time protection as green.
Advanced Options
Only users with a macOS Administrator account can perform the following tasks (caution is advised):
- Disable protection features (under Scan page, Settings, or system tray icon)
- Uninstall the program
Summary
Kaspersky Plus for Mac is a paid-for antivirus program and an excellent choice for non-expert users. Some of its key aspects are:
- simple and straightforward installation and guided setup of core features
- all available features displayed in a well-organized and neat interface
- different scan options and many settings, including scheduled scans and automatic USB scan
- clear alerts
- normal user accounts cannot take risky actions (e.g., disable protection, uninstall program)
Installation, Setup & Deinstallation
You can set up Kaspersky Plus for Mac by downloading and running the installer from the vendor’s website. The initial setup is straightforward as the program guides you through step by step and provides brief explanations. During that, you can enable additional protection features, such as Wi-Fi network protection and browser extensions for Safari/Chrome/Firefox. When setup is complete, the main program window displays several recommendations, such as activating automatic macOS updates, signing into My Kaspersky account, and installing missing browser extensions, the Kaspersky VPN or Password Manager apps. The program can be uninstalled by clicking Support > Uninstall in the Help menu of the macOS menu bar or by deleting it from the macOS Applications folder.
General Handling & Essential Features
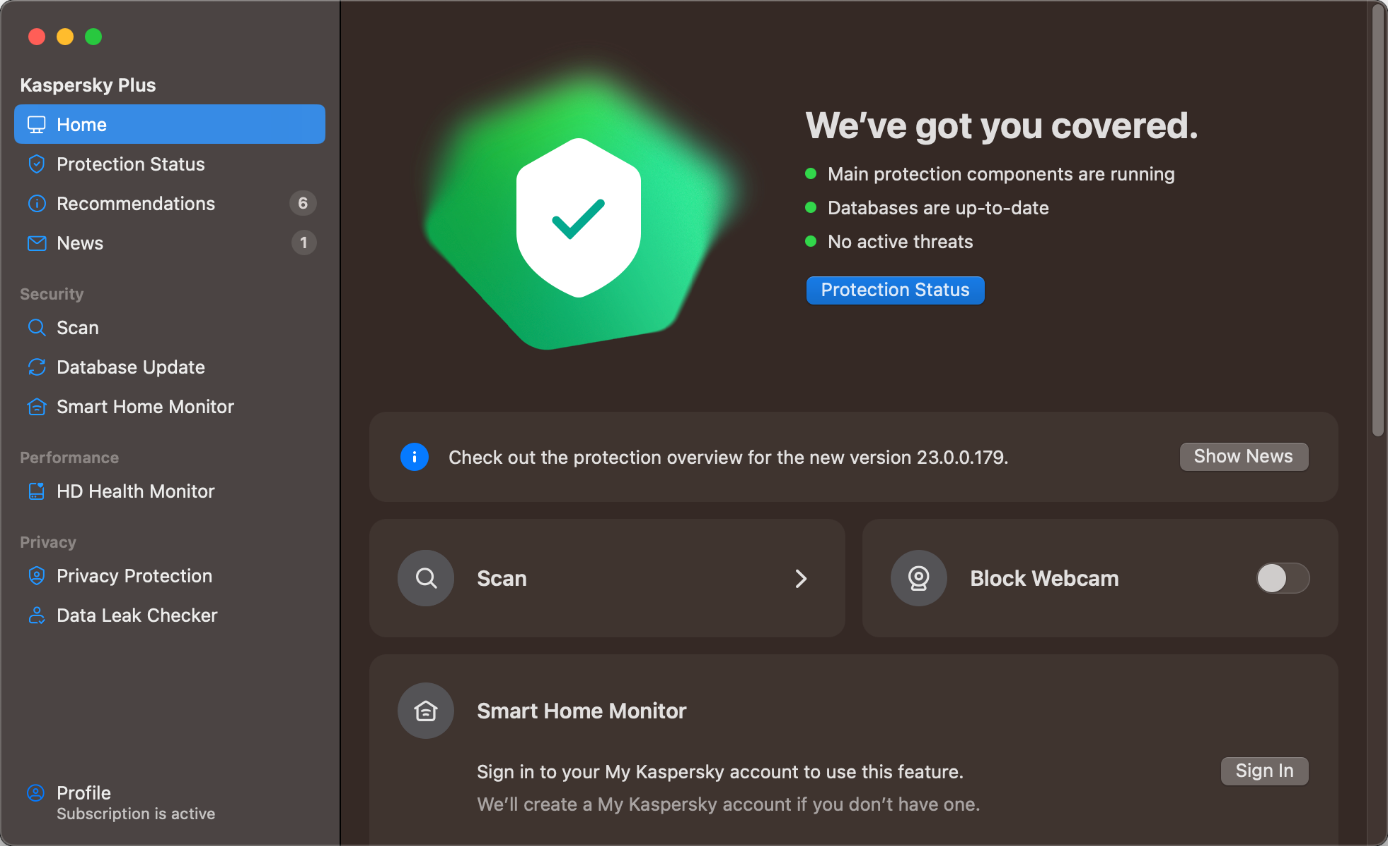
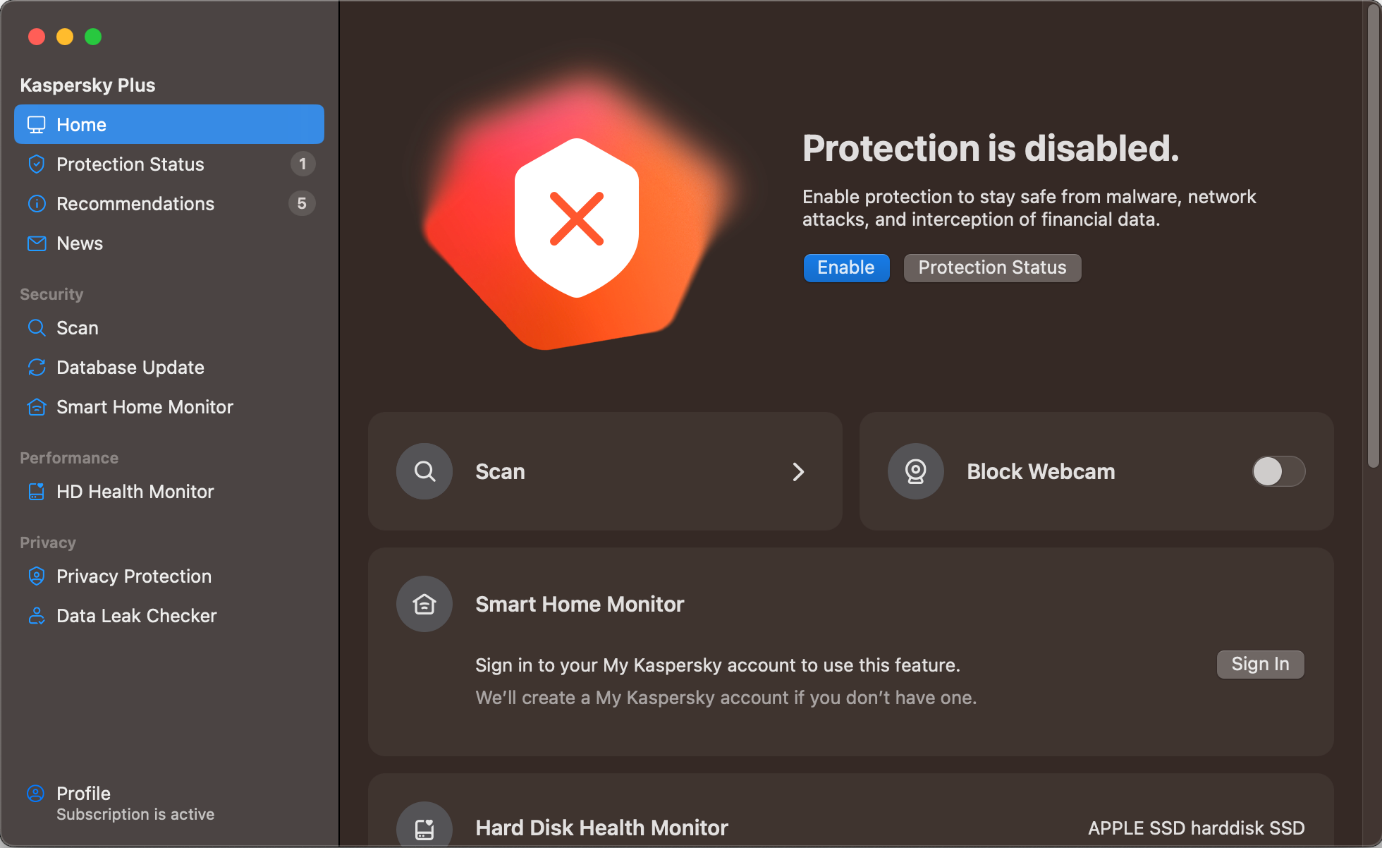
Protection status, scan options (Scan), and subscription information (Profile) can all be accessed from the main program window. Settings, including all the protection features and list of scan exclusions (Trusted Zone), quarantine (Detected Objects), and help, which shows the support page in the default browser, are all in the macOS menu bar. A manual update can be triggered from Database Update in the main program window or by clicking Update Databases from the system tray icon.
Protection
From Scan, you can start a quick scan, full scan, or custom scan of selected files or folders. The latter can also be run from e.g., the Finder context menu. Scans can be scheduled from the cogwheel icon in the top right-hand corner and the settings. In addition to modifying the program’s detection behaviour and the named scan options, the external disk scan can be configured from the settings. The detection of stalkerware is enabled by default.
Alerts
When we disabled Kaspersky’s real-time protection or any other protection feature under Settings > Protection, a notification appeared, and an alert similar to the one below was shown in the main program window. The real-time protection can also be turned off via the system tray icon. We were able to easily reactivate either protection feature by clicking Enable.
When malware was detected in our protection test, the program displayed an alert in the form of a system notification shown below, including the file path, where the threat was found, and the action taken. No user action was required, and the alert closed automatically after a few seconds. Additionally, a link to the quarantine is shown on the home page of the main program window.
Quarantine & Logs
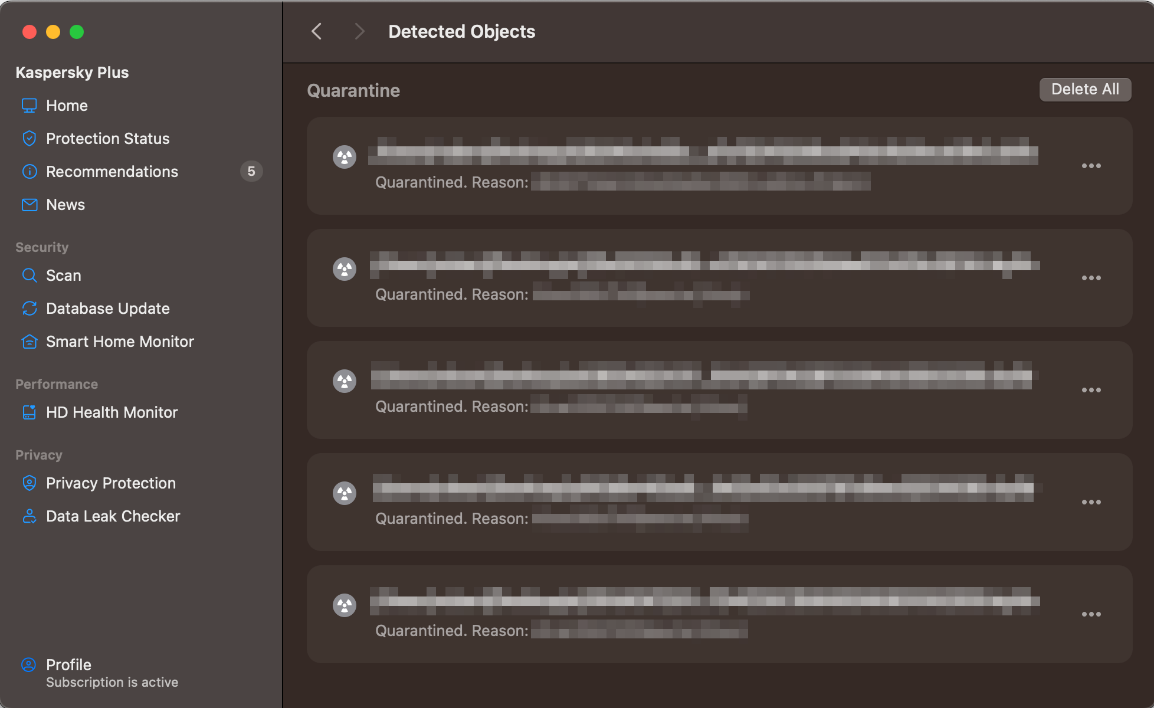
The Detected Objects page shows quarantined items, along with the threat name and file path. By clicking on the ”…” symbol at the end of each line, you can delete or restore individual items. You can delete all quarantined items using the Delete All button. The Reports window shows processed objects (detections) as well as activities about updates, scans, and the different protection features.
Advanced Options
Only users with a macOS Administrator account can perform the following tasks (caution is advised):
- Disable protection features (under Settings or system tray icon)
- Uninstall the program
Summary
Trellix Endpoint Security (HX) is a security package suitable for large-sized enterprise networks (up to 100,000 endpoints per appliance) and provides a cloud-based console for managing the endpoint protection software. Some of its key aspects are:
- investigative functions for analysing and remediating attacks
- comprehensive search facilities
- variety of console types (cloud-based, hardware/virtual appliance, Amazon-hosted)
- well-organized cloud-based console with easy access to details pages
- containment feature to isolate infected devices
Management Console
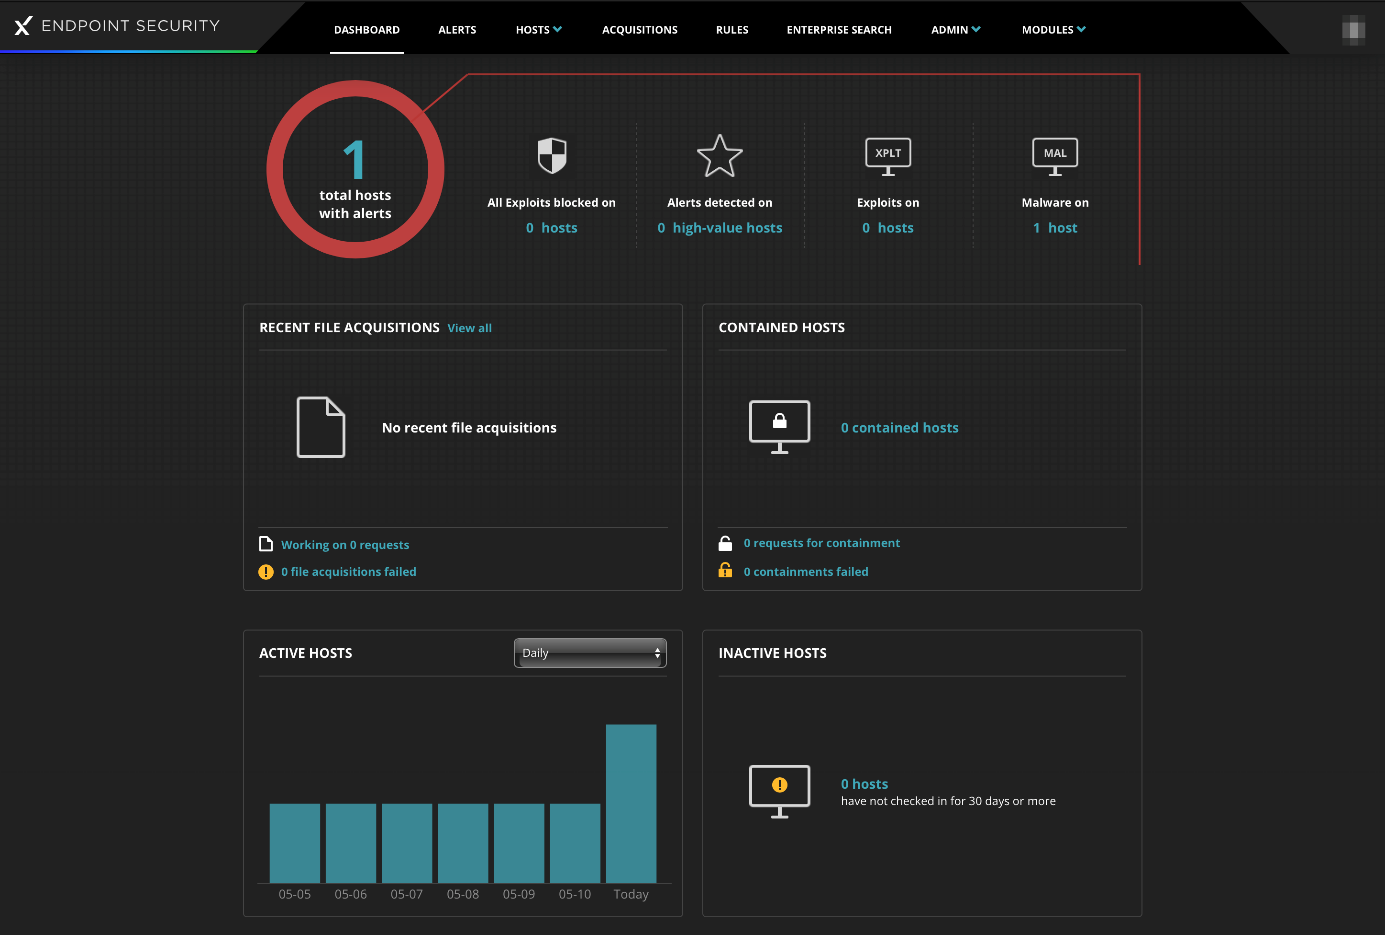
The console is navigated from the menu at the top of the page. This lists different sections and pages, such as Dashboard, Alerts, Hosts, Acquisitions, Rules, Enterprise Search, and Admin. We will describe the most relevant sections and pages below.
Dashboard
When you login to the console, you will see an overview of key status items (screenshot above). These include the total number of hosts with alerts, with a breakdown by exploits and malware, recent file acquisitions, and contained/active/inactive hosts. Clicking on the Total hosts with alerts button opens the Hosts with Alerts page.
Hosts > Hosts with Alerts page
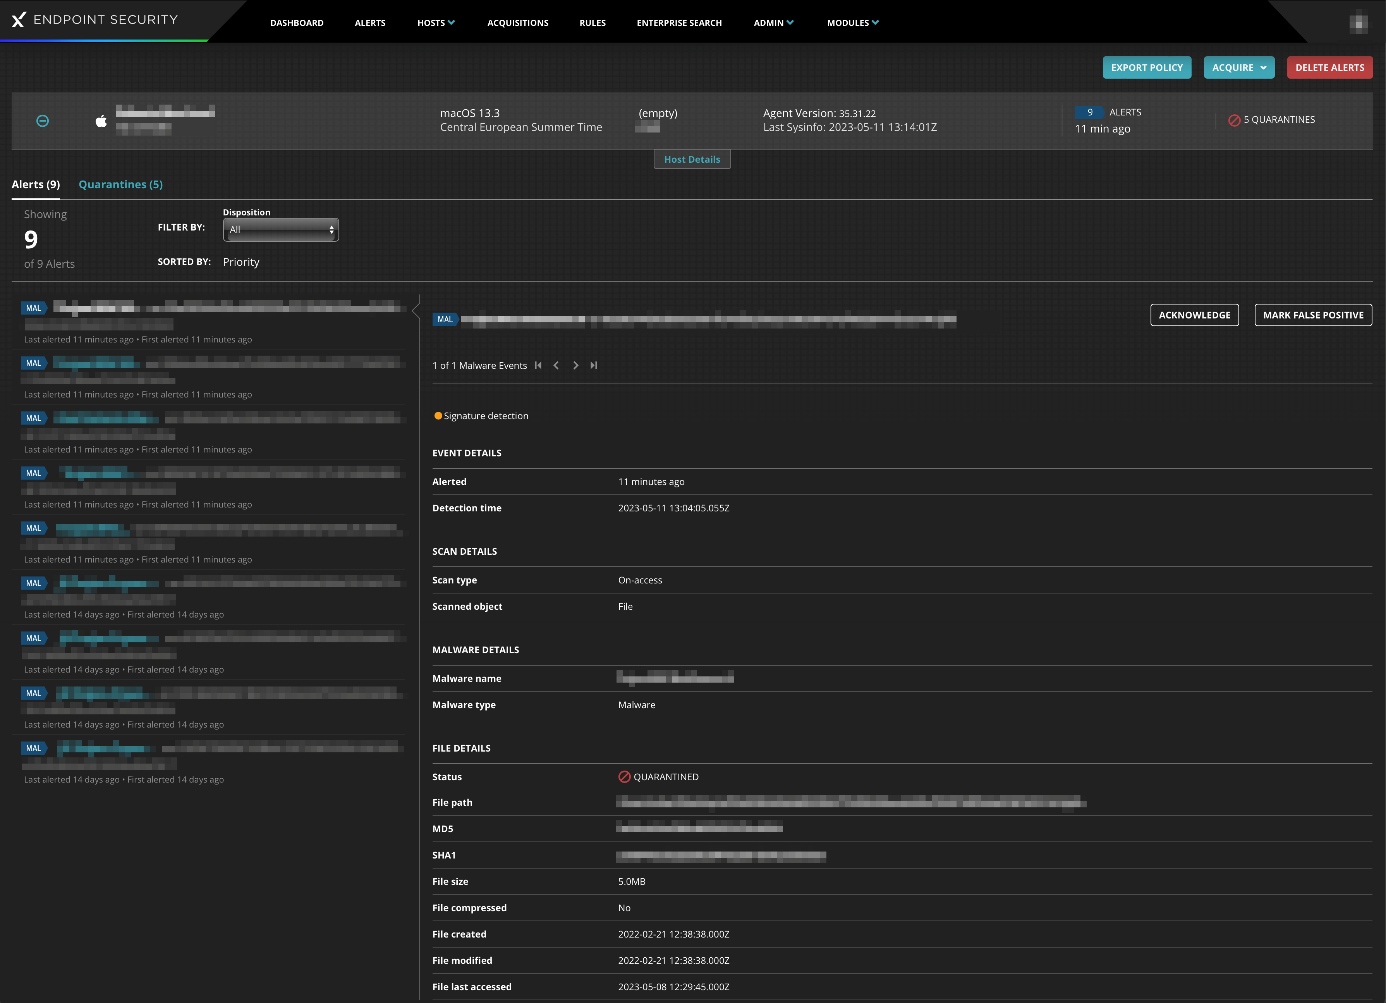
This page displays details of protected devices/hosts with alerts that have not yet been resolved. If you click on the plus sign for a host, you can view the list of its alerts, in chronological order and with a wealth of details. This includes detection type (e.g., signature detection), alert/detection times, scan type (e.g., on-access, on-demand), malware name/type, file status (e.g., quarantined), file metadata (e.g., path, MD5/SHA1 hash, size, last modified/accessed times), process path, username of logged-on user, and content version (signature). Each threat can be acknowledged (marked as “read”), or marked as false positive. You can also add comments for future investigation. From Quarantines, you can restore, delete, or acquire individual quarantined files for further analysis (see Acquisitions page shown below).
Alerts page
For a threat-centric rather than a device-centric view, you can go to the Alerts page. It shows a list of detected threats which you can sort or filter by name, file path, first/last event time, host name, or host IP address. Besides deleting alerts, options for Acknowledge, Mark False Positive, and Add Comment are provided here too. If you click on the threat name of a list item, the details view of the Hosts with Alerts page is opened.
Hosts > Host Management page
This page lists all the registered devices/hosts along with different attributes shown in filterable and sortable columns. The visibility of each column can be changed from a separate menu in the top right-hand corner. The attributes include, e.g., host name, online status, operating system information, username of logged-on user, containment status, installed agent version/signature, active protection/detection capabilities, and last seen date. Clicking on an entry reveals a panel with all the available device information.
Acquisitions page
This page lets you download files that have been acquired from hosts in order to analyse them. You can acquire files or various items of diagnostic data from an individual host on the Hosts with Alerts page.
Rules page
This page contains rules matching indicators of compromise (IOCs), exploit detections, or false positives in order to help identifying specific threats or suspicious behaviours on an endpoint. This rule collection is primarily maintained by Trellix’s Dynamic Threat Intelligence (DTI) cloud, but you can add your own enterprise-specific rules with individual conditions as well.
Enterprise Search page
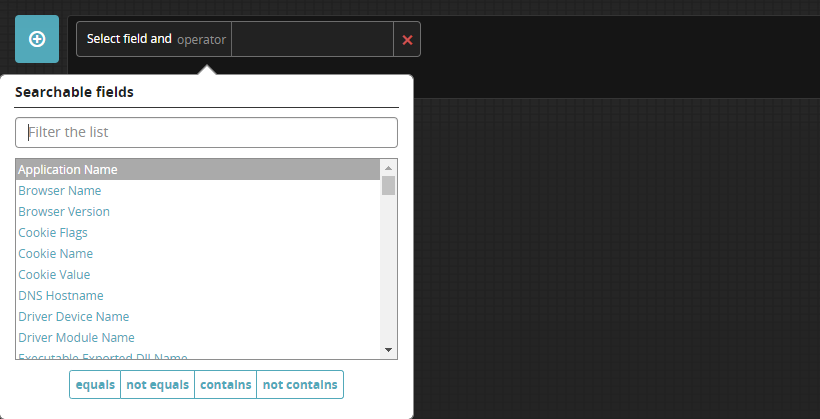
On this page, you can extensively search the network for a wide variety of items. These include application name, browser version, host name, various executables, file names/hashes/paths, IP address, port, process name, registry key, service name/status/type/mode, timestamp, URL, username, and Windows Event Message.
Admin section
On the Policies page, you can add custom endpoint protection policies and configure numerous different aspects of existing ones. Examples of configurable categories are malware protection (e.g., detection options, definition updates, exclusions, quarantine actions), malware scans (e.g., scheduled scan), whether to show alerts on the host, event logging (e.g., information level, age), polling frequency, removal and tamper protection, resource usage, and management server address. On the Host Sets page, groups of hosts can be defined according to a wide variety of criteria, or simply by dragging and dropping from the list of all hosts. Different protection policies can be applied to each host set.
Endpoint Protection Client
Deployment
Current and older versions of the endpoint protection client (Agent) for Windows, macOS, and Linux systems can be downloaded from the Admin > Agent Versions page. The installer file can be run manually, or via a systems management product such as Jamf. In the former case, you will need to remember to give the agent Full Disk Access in the macOS system settings which is necessary for the product to work properly. After installation, the agent takes some minutes to download the protection engine before protection will be finally active.
General Handling & Alerts
With the settings used in this test, no user or command-line interface is provided in order to interact with the program on the host. When malware was detected in our protection test, no detection alerts were shown on the host.
Summary
Trend Micro Antivirus for Mac is a paid-for antivirus program and well suited to non-experts. Some of its key aspects are:
- simple and straightforward installation and guided setup of core features
- all available features displayed in a well-thought-out user interface
- different scan options including scheduled scans; ransomware protection, browsing-protection add-ins
- clear and persistent alerts
- normal user accounts cannot take risky actions (e.g., disable protection, uninstall program)
Installation, Setup & Deinstallation
After downloading and running the installer from the vendor’s website, the setup wizard guides you through each installation and configuration step. Aside from choosing whether to enter a licence key or use the trial version, there are no decisions to make. When you first open the program, it prompts you to set up Camera and Microphone Protection and ransomware protection (Folder Shield). For the latter, you can easily customise the default list of folders to be protected. Additionally, the Safari extension Trend Micro Toolbar for Mac is installed and will be activated if you authorise this. The program can be uninstalled by using the uninstaller located inside the Trend Micro folder of the macOS Applications folder. The Trend Micro folder also contains a diagnostic toolkit used for troubleshooting and other problem-mitigating tasks (requires a macOS administrator account).
General Handling & Essential Features
Protection status, smart scan (Scan Now), scan options (Scans), protection features, and subscription information can all be accessed from the Overview page of the main program window. Quarantine can be found under Logs > List Quarantined Files. Settings provide access to a list of scan exclusions (Files Not Scanned) and the quarantine and are located under Trend Micro Antivirus in the macOS menu bar or the system tray icon. A manual update can be triggered directly from the Overview page, Protection menu in the macOS menu bar, or the system tray icon. The online help opens the support page in the default browser and is found in either the Help menu in the macOS menu bar, the system tray icon, or when clicking the ? icon located on several pages of the main program window.
Protection
From Scans, you can start a smart scan of the most critical areas, full scan of every file on the system, or custom scan of selected files or folders. Scheduled scans as well as the detection behaviour and scan options can be configured in the Scans page of the settings. The web protection and anti-ransomware feature can be modified from its respective subpage of the main program window. If you install the Trend Micro browser extension, safety ratings (indicated by coloured symbols) are added to Google, Bing, and Yahoo search results as well as web-based email services from Gmail and Yahoo. A Website Filter blocks access to selected websites based on rating scores, pre-defined filters (e.g., child, teenager, adult) or a user-defined blacklist.
Alerts
When we disabled Trend Micro’s real-time protection or web threat protection on the Overview page or from the Protection menu in the macOS menu bar, the alert below was shown in the main program window. The real-time protection can also be turned off via the system tray icon. We were able to easily reactivate either protection feature by clicking Fix Now.
When malware was detected in our protection test, the program displayed the alert shown below. No user action was required, and the alert persisted until we closed it. Clicking on View Results opens the logs/quarantine page and shows you what’s been detected.
Quarantine & Logs
The Logs page lists all the threats that have been detected, along with the threat name, file path, date when this happened, and action taken, under the log type Scan Results. Quarantine functionality, including options to delete, restore, or clean quarantined items (you have to enter administrator credentials to take either action), is reached by clicking List Quarantined Files.
As noted in previous years, the quarantine and log data are displayed in panels within small windows that cannot be resized or maximised. It is necessary to resize the columns to see all the content, and then scroll to the left to see all the data for one entry. We found this very inconvenient. However, it is possible to export the log as a .CSV file.
Advanced Options
Only users with a macOS Administrator account can perform the following tasks (caution is advised):
- Disable protection features (under Overview)
- Uninstall the program
- Delete and restore items from quarantine
Advertising
The program advertises Trend Micro’s freemium Cleaner One Pro program. Running a Smart Scan will find “junk files” and prompt the user to get Cleaner One Pro to remove these. Additional freemium software is promoted on the pages Privacy Tools and Utility Tools of the main program window.


